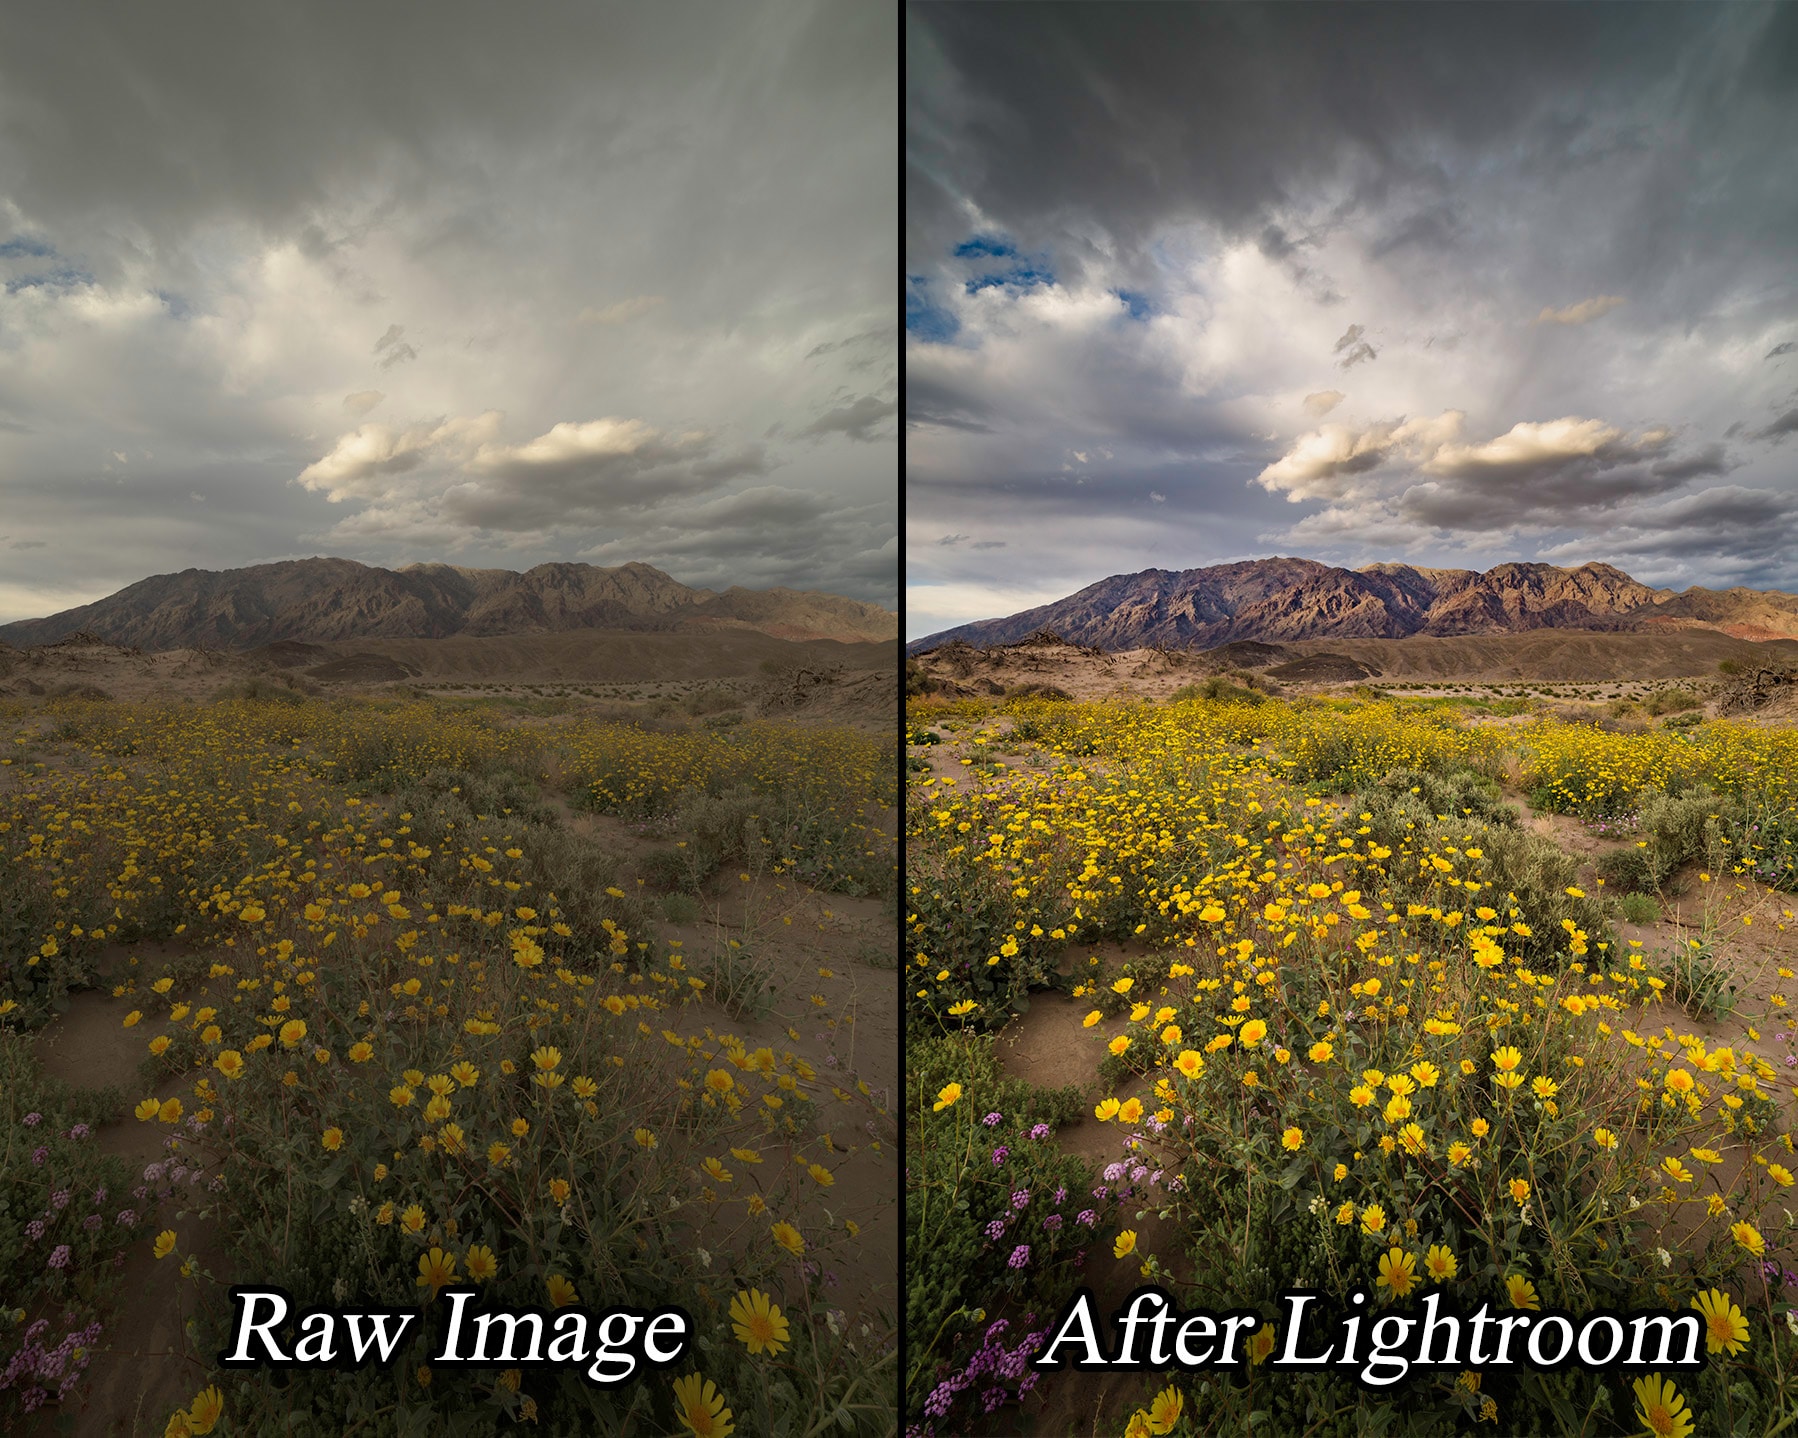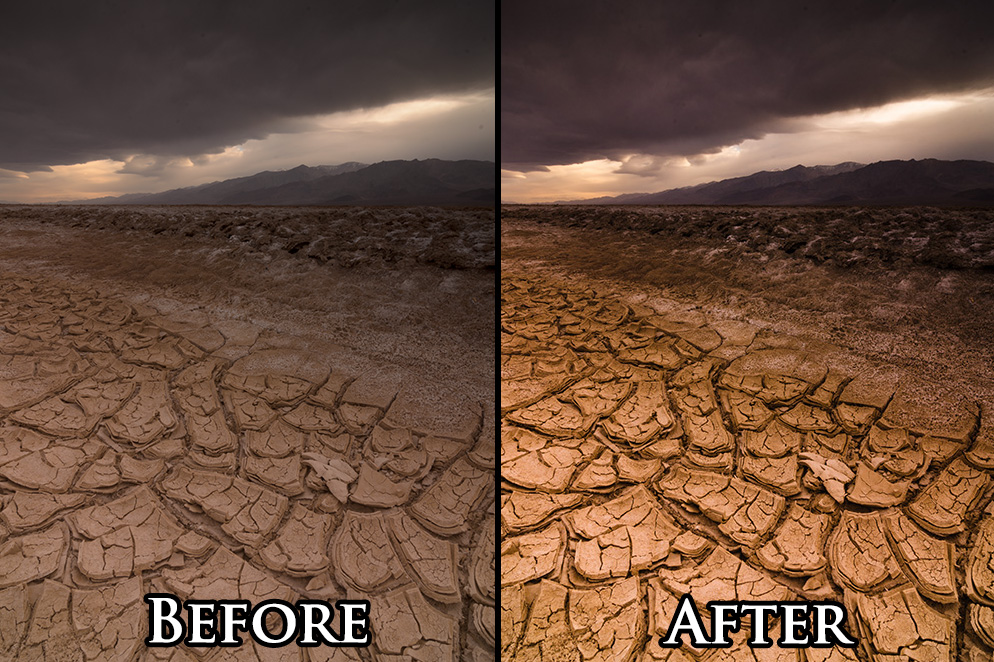
In this Lightroom workflow tutorial learn how to intelligently develop your landscape photos to achieve your artistic vision. You’ll learn about basic adjustments, the tone curve, graduated filters, local adjustments, the dehaze tool, color correction, and more.
When taking photos out in the field I am not always looking for the best photo on the back of my camera, I am looking to get the best possible data that I can then process later. If you are new to Lightroom or are trying to find the best way to use it I recommend checking out this full length Lightroom Master Raw Processing Tutorial which will take you through all of the best practices, my favorite tools and how to get the most out of Lightroom.
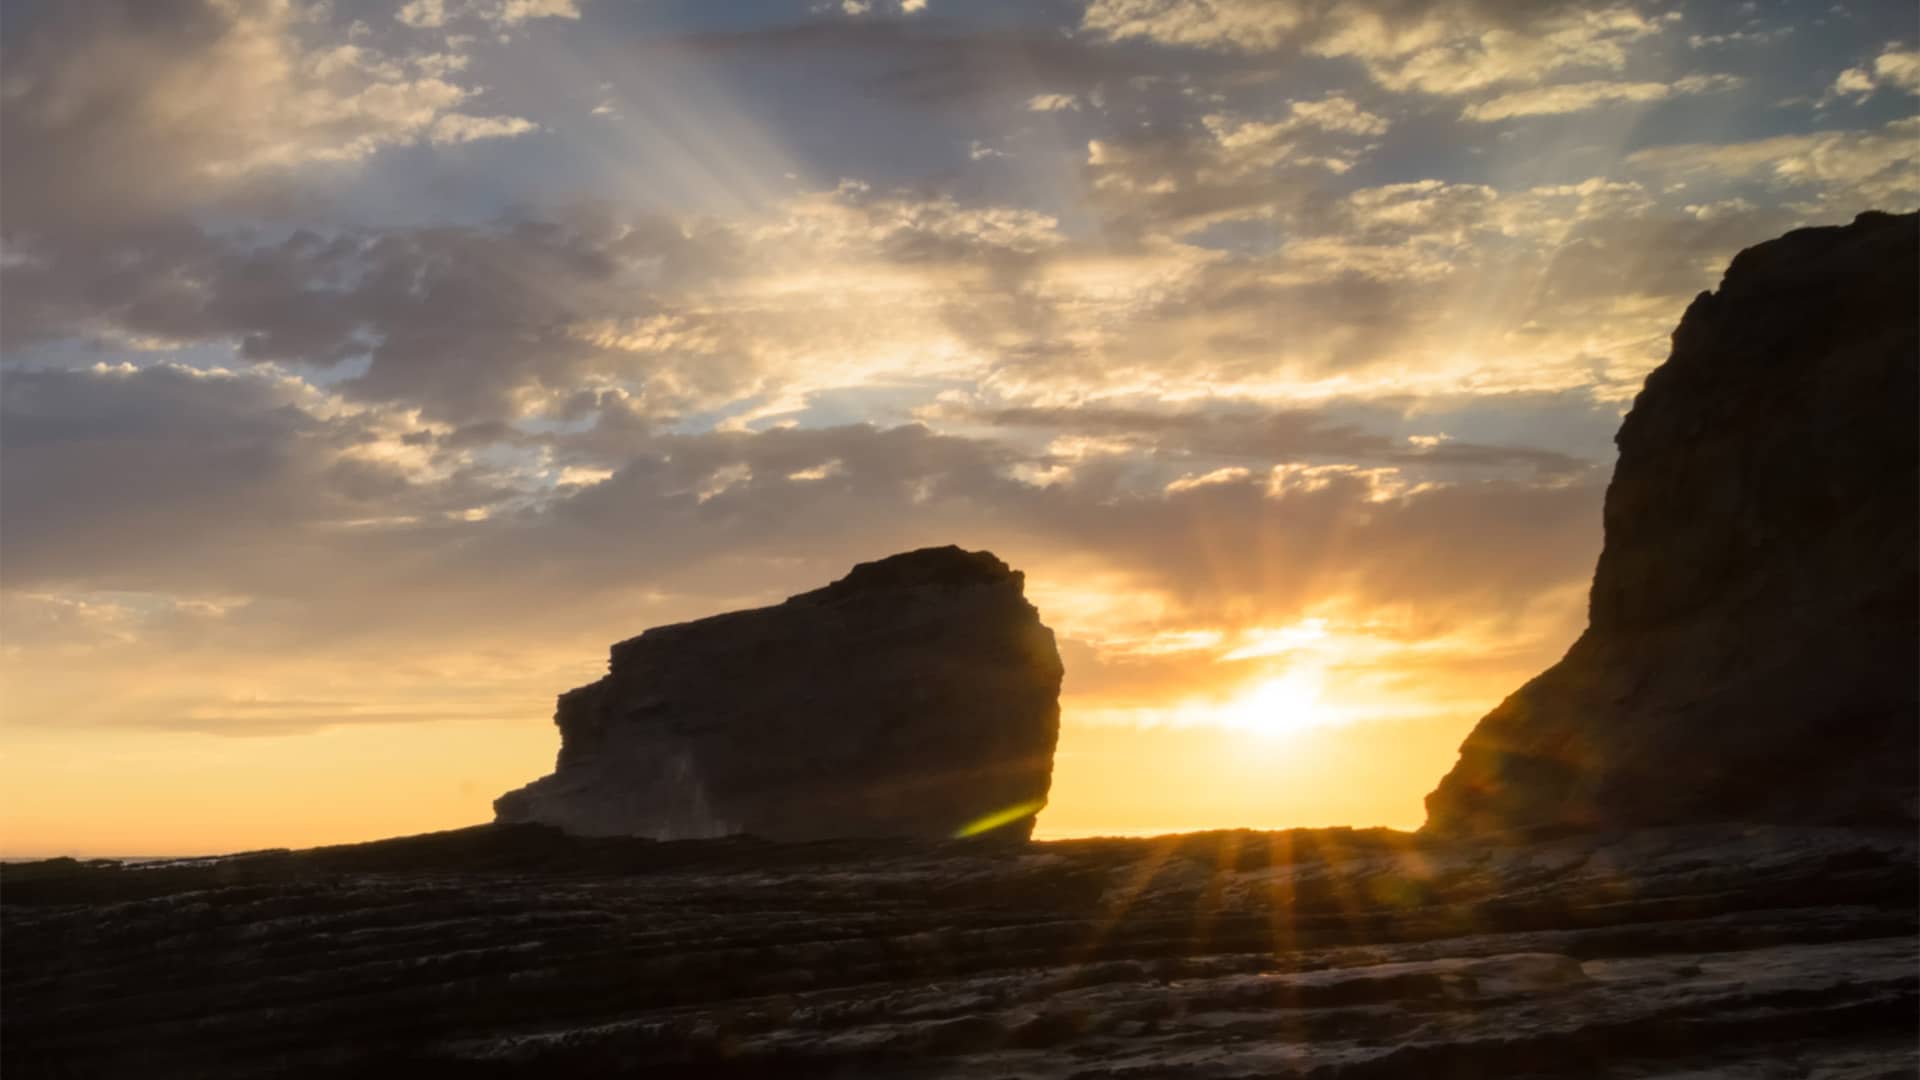
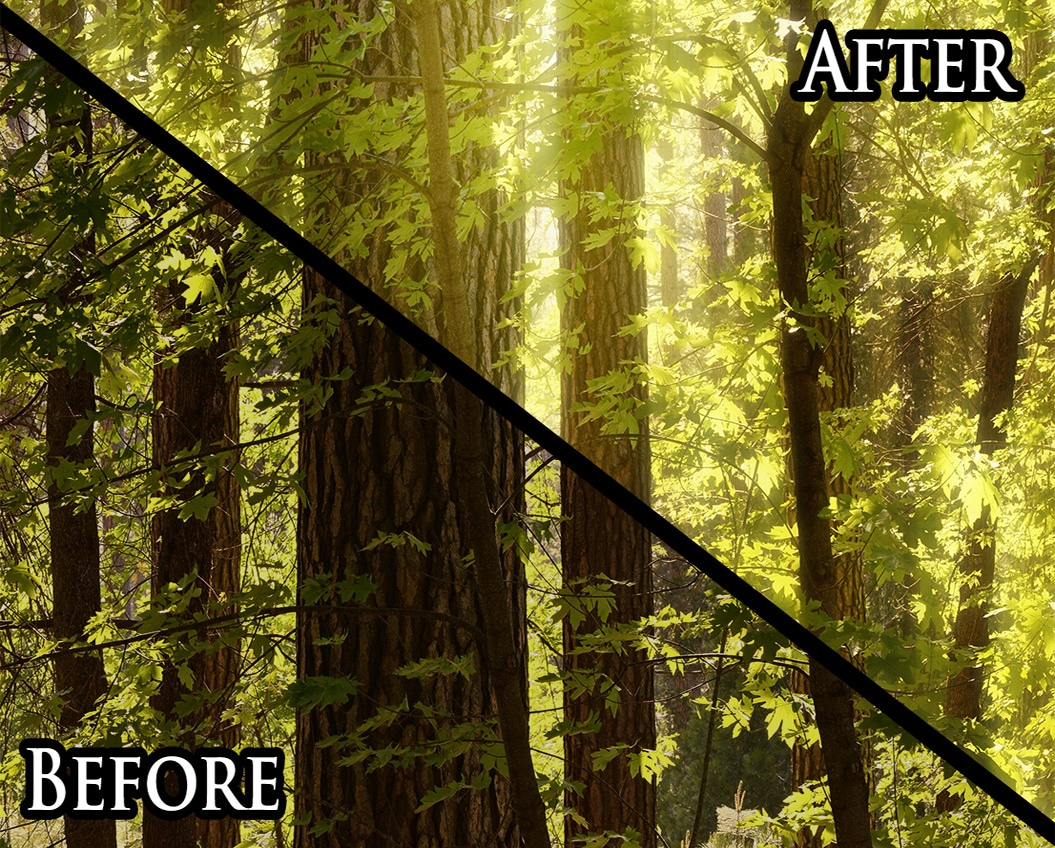
Want to learn how to add sweet rays to your photos? here’s how…
This technique will work for a lot of images but the best ones will have speckled clouds with a lot of light and dark which will give you the best look for the beams. We are going to isolate some of the brightest areas of the photo and then we are going to duplicate them and stretch them out in a way that will make them look like light beams.
Start by creating a completely new layer using: Ctrl + Alt + Shift + N and then add a layer mask to that.
One of the quickest ways to isolate highlights in Photoshop is to go to:
Image> Apply image and use the default settings
This creates a gray scale copy of the image as a layer mask – which is very cool! And it will help us to highlight those light and shadow areas.
Next you want to make those a little more obvious and you can do this by holding Alt / Option clicking on the layer mask thumbnail, that brings up what the layer mask looks like. Then Ctrl + M brings up a curves dialogue allowing you to adjust the tones of that layer mask.
I drag the black point to the right and the white point to the left to isolate the highlights of the image.
Now turn the highly defined mask into a selection by:
Holding Ctrl + clicking on the layer mask thumbnail
Then with those selected, click Ctrl + J which turns your selection into a completely new layer.
Now you can delete the masked layer as we are only interested in the highlight layer from now on. And here’s the fun part where we get to blur it out and make it look a lot more like sun beams!
Go to:
Filter > Blur > Radial Blur
This will allow you to stretch out your image from a center point – make sure your blur method is set to zoom and I like to put the amount up to 100 and select in the box roughly where your light source is.
This will create a bit of a blur, so now you want to exaggerate them and make them really defined so I am going to blur them a couple more times by hitting Ctrl + F
To make this stronger, duplicate the layer a bunch of times using Ctrl + J and then group all of this together by holding Shift + clicking on the bottom layer to select them all and use Ctrl + G to put them in a group.
By adding another layer mask we will be able to get rid of the bits that are highlighted that we don’t want to see, clicking Alt + layer mask fills it with black and then we can paint them back in where we want them.
Using the B brush tool with a white F/G color and a low opacity gives a subtle stroke which is the best for this.
Now, figure out where the highlights are: start at the highlights and paint away from the light source. You might find there are some areas where there are unwanted overlap, so once you have painted them you can come in with a black brush with high opacity and paint areas where the beams shouldn’t be.
Also make sure the sun beams don’t highlight backwards over dark areas, they should come out of highlight areas not shadow areas.
Hey photo dudes and dudettes, when I was recording a video about how to use Photoshop to turn a bunch of back to back to back photos into a long exposures, I realized you could use the same technique on time-lapse videos to create EXTREME long exposures.
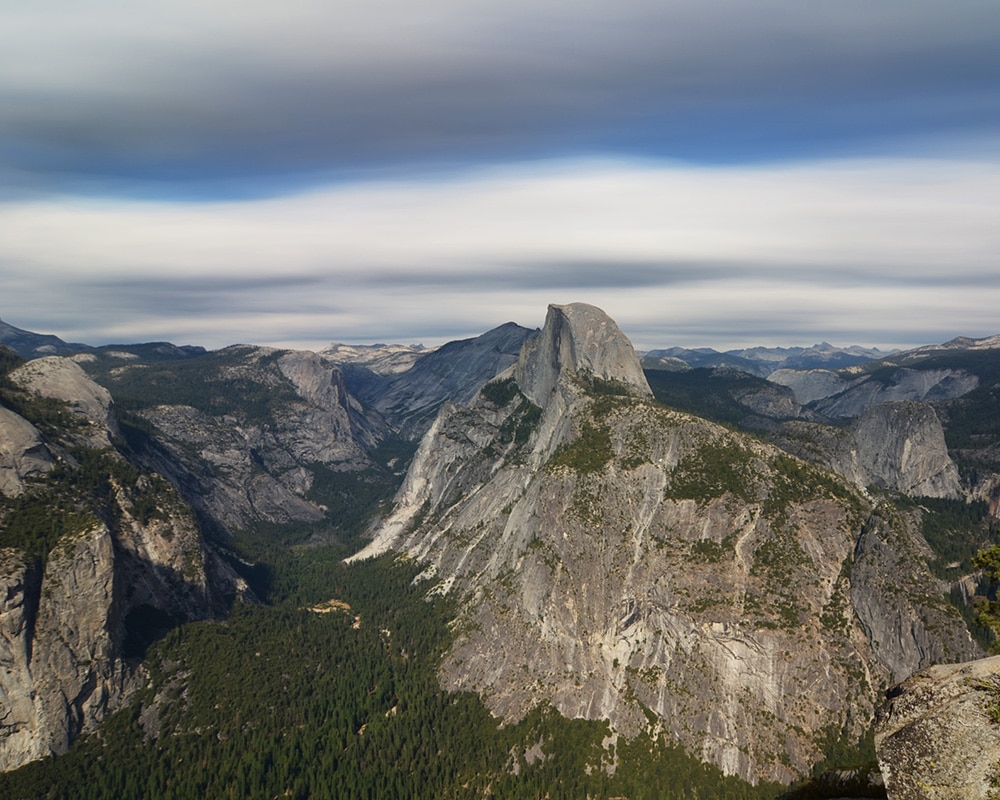
I shot a time-lapse in Yosemite and with a little processing I can turn that time-lapse video into an image, which is a simulated long exposure of 14 minutes, shot in the middle of the day, that’s actually composed of 263 individual photos from the time-lapse. And since I ran that time-lapse for a total of 45 minutes, I could’ve extended this LE three times as long.
Ok, so how do you do it? Well first you need your individual frames from your time-lapse, so hopefully you have all the source images. If not, you can use VLC media player to extract individual frames from your TL.
I should also mention that this technique only works for stationary timelapses, so if your camera was moving on a rail or rotating then this won’t work. But if you’re sitting still on a tripod it’ll be sweet.
What we’re going to do now is average together all the frames, which in a sense is exactly what your camera is doing during a long exposure: taking a running average of everything that’s happening in a scene while the shutter is open.
So what you need to do in Photoshop is go to file -> scripts -> load files into stack
Load as stack, create smart object, layer->smart object-> stack mode-> mean
That’s all there is to it, but bear in mind that the more files you use the longer it will take PS to churn through. You also want to make sure your computer has plenty of RAM and lots of free space on the disk where Photoshop has its scratch disks, otherwise the process will crash and burn.
Best practices
————–
– Use timelapses where motion is uniform.
– Don’t use too many frames; frames covering a span of time from 30 to 90 seconds seems to give the best results. Though if you have really really uniform movement longer can be cool
– Make sure frames are close enough for smooth motion in TL. That will make smooth LE motion. If frames are too far apart in time you’ll get gaps and spaces and repeating elements in your LE
It’s a super fun technique and I hope you enjoy it. I’d love to see the results you get.
Hey photographers, did you know you could turn a series of photos into a simulated long exposure?
A while back I created this tutorial about how to use multiple exposure mode on your camera to simulate the effects of doing a long exposure. And a lot of people wrote in to say hey this is super cool but how can I do it if I don’t have multiple exposure mode on my camera model?
And of course the answer is you can do it in Photoshop using the exact same idea. When you use ME mode in your camera you average together a bunch of different shots to get the same look as a single long exposure. For example, 6 of these 1/6″ shots averaged together in ME mode end up looking like a 1″ shot.
We’re going to do the exact same thing in Photoshop, average all the photos together. And I’m gonna show you an automatic way to do it and then in the second part of the video I’ll show you a manual way.
But before we get into it you have to have the right source images to work with. Basically you can do this with any sequence of photos, but they need to be shot on a tripod back to back, with as short a gap as possible between shots, otherwise you’ll see weird spaces in your final image.
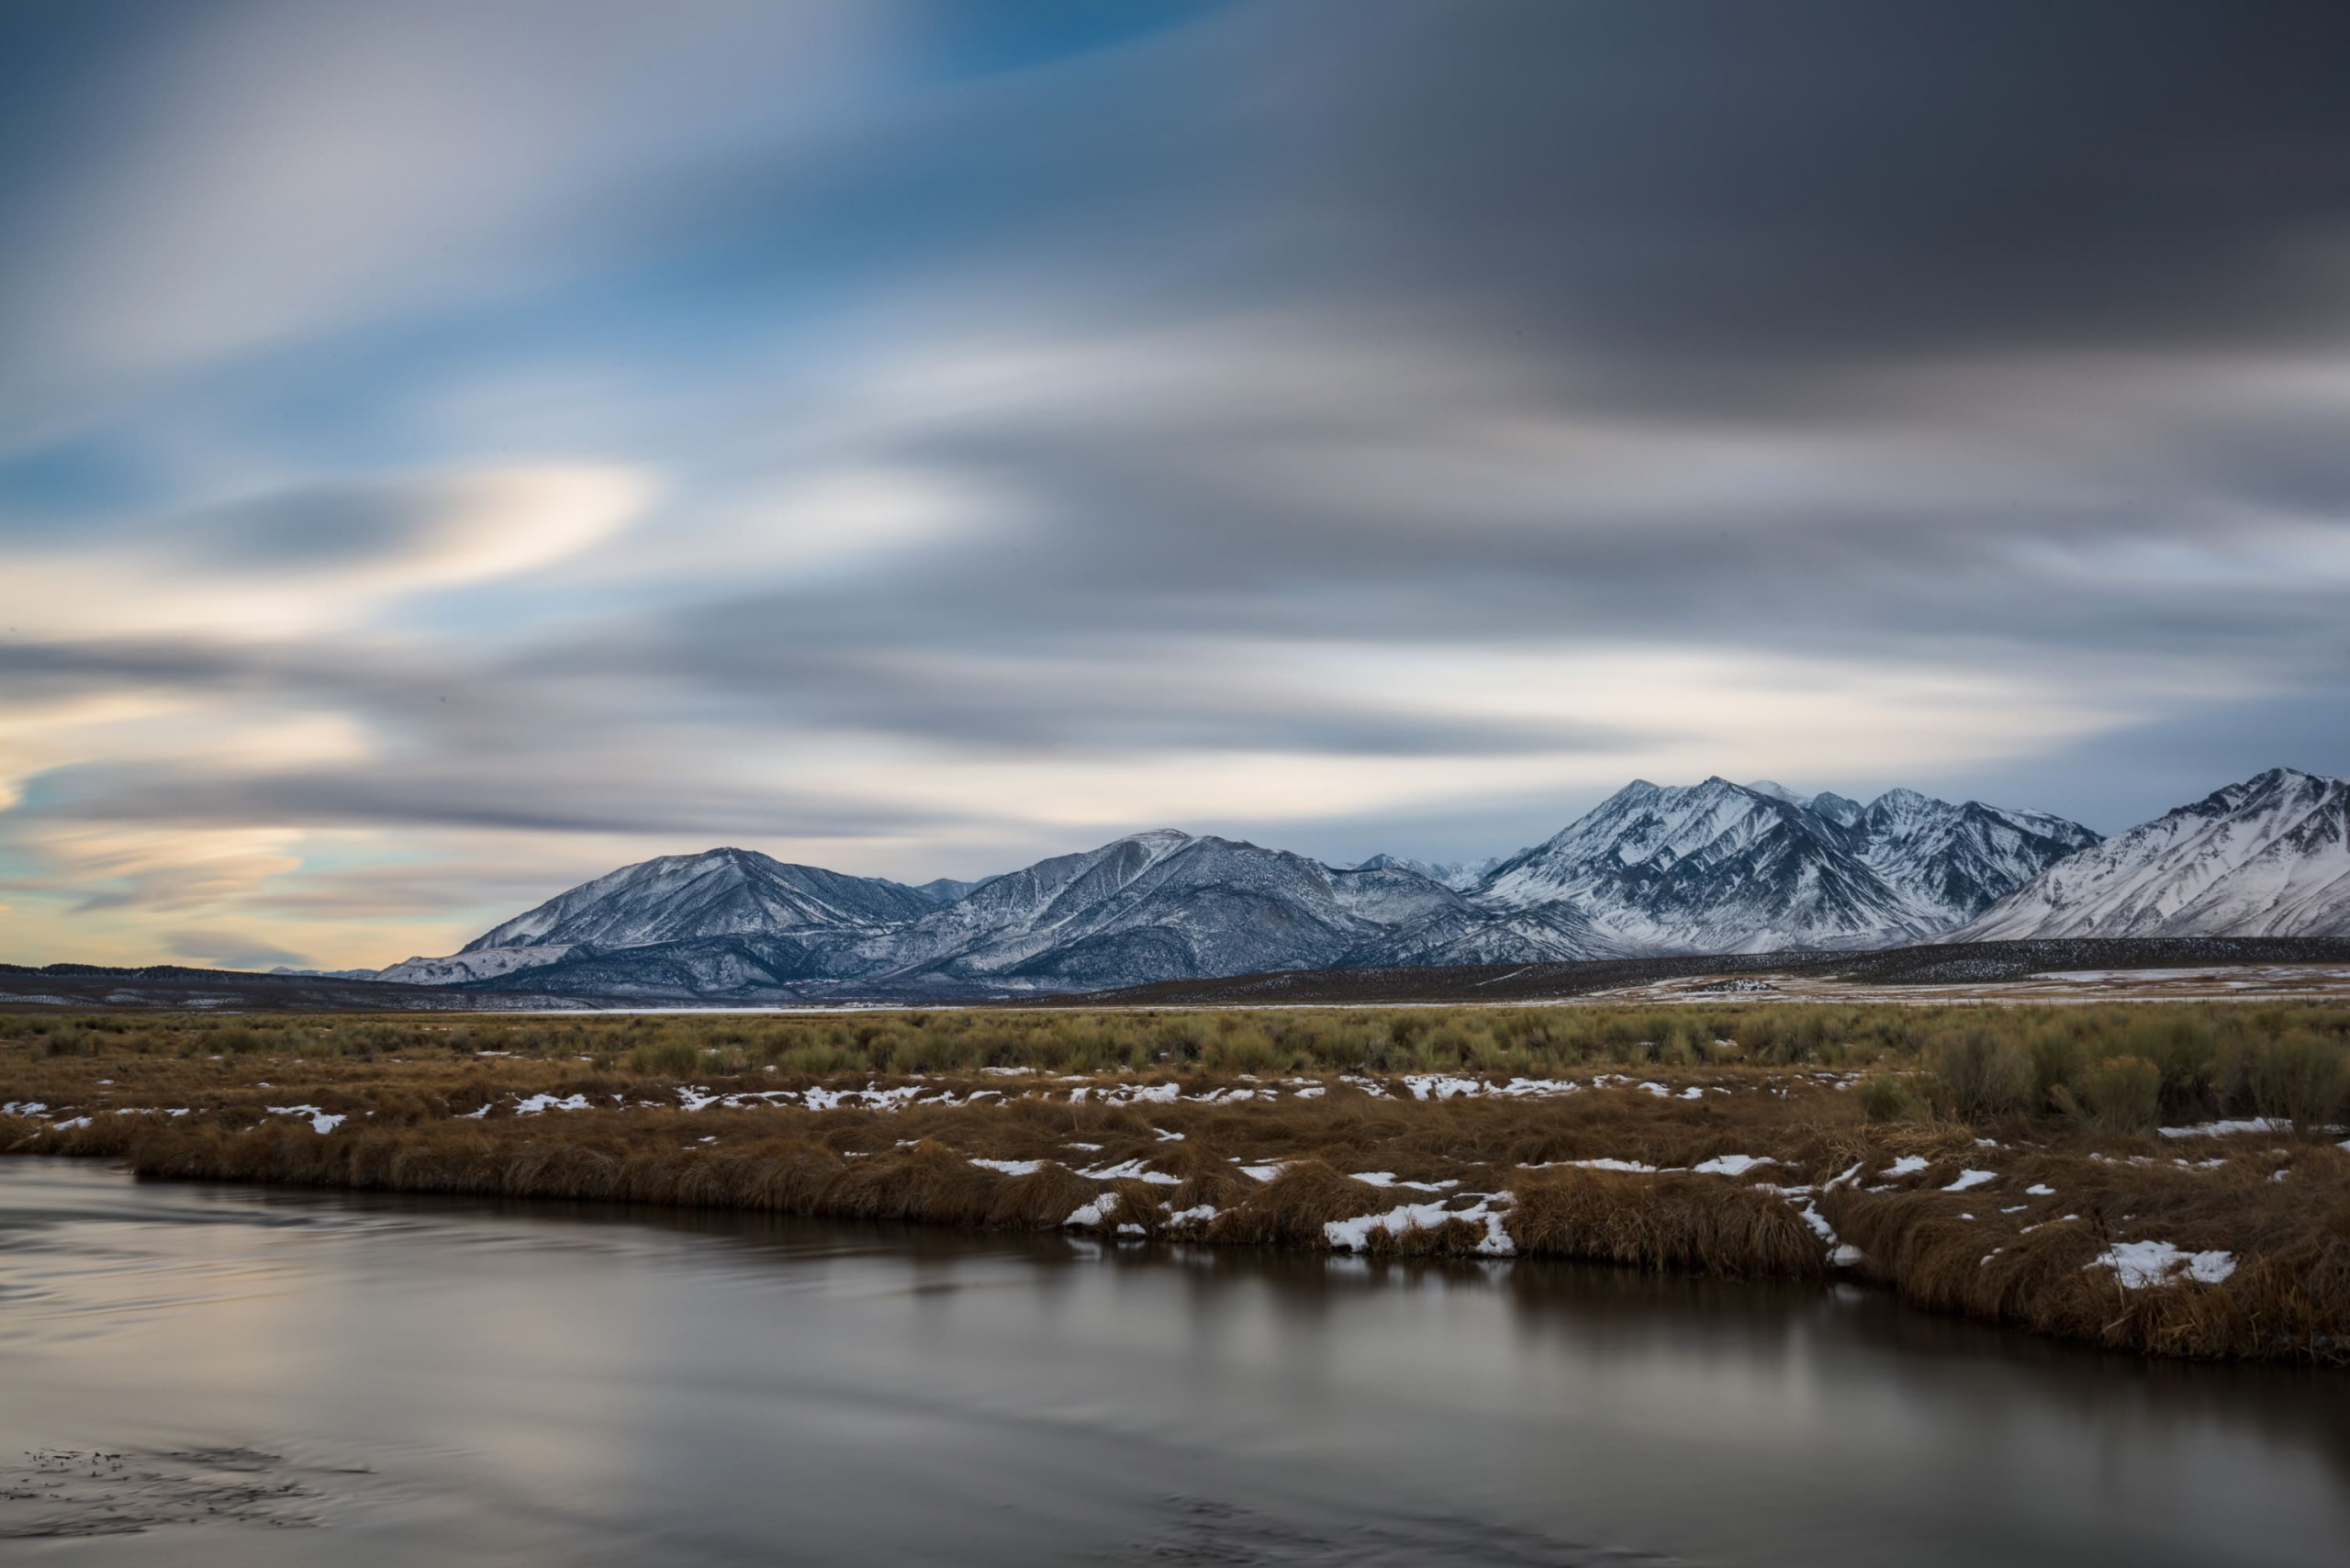
For example, when shooting a sequence of 34 photos the other day, with my shutter release set to Continuous, there was some motion in the clouds from beginning to end, that’s perfect for simulating a long exposure.
These were all shot at a shutter of 3″, so when we combine all 34 in PS, it will look similar to a single shot of 34 times that shutter speed, or 102″!!!
First let’s look at the quick/automatic way to simulate a long exposure.
Go to File -> Scripts -> Load Files into Stack
Select Files, Create Smart Object, OK
Layer -> Smart Object -> Stack Mode – > Mean
And voila, you’ve got a simulated long exposure!
If you don’t have this capability, because some older versions of PS don’t, you’ll have to do it the Manual Way. Here we’re going to play with layer opacity to get the same result.
Before we do I find it helpful to rename each layer from 1 to whatever. Then all you do is set the opacity of each layer to 1 over the layer number. For example, layer 1, 1 over 1 is 100%. Layer 2, 1 over 2 is 50%. Layer 3, 1 over 3 is 33%, and so on. Work your way all the way up to however many layers you have, and you’ll get the same overall average.
Nice thing about this technique is there’s no limit to the number of photos, so you can create super long exposures if you want. I could’ve shot another 33 photos to add 99 seconds to the shot. Or I could just combine 10 of these photos for a 30″ equivalent shot. So you can see there’s a ton of flexibility and I hope you guys have fun playing with this technique.
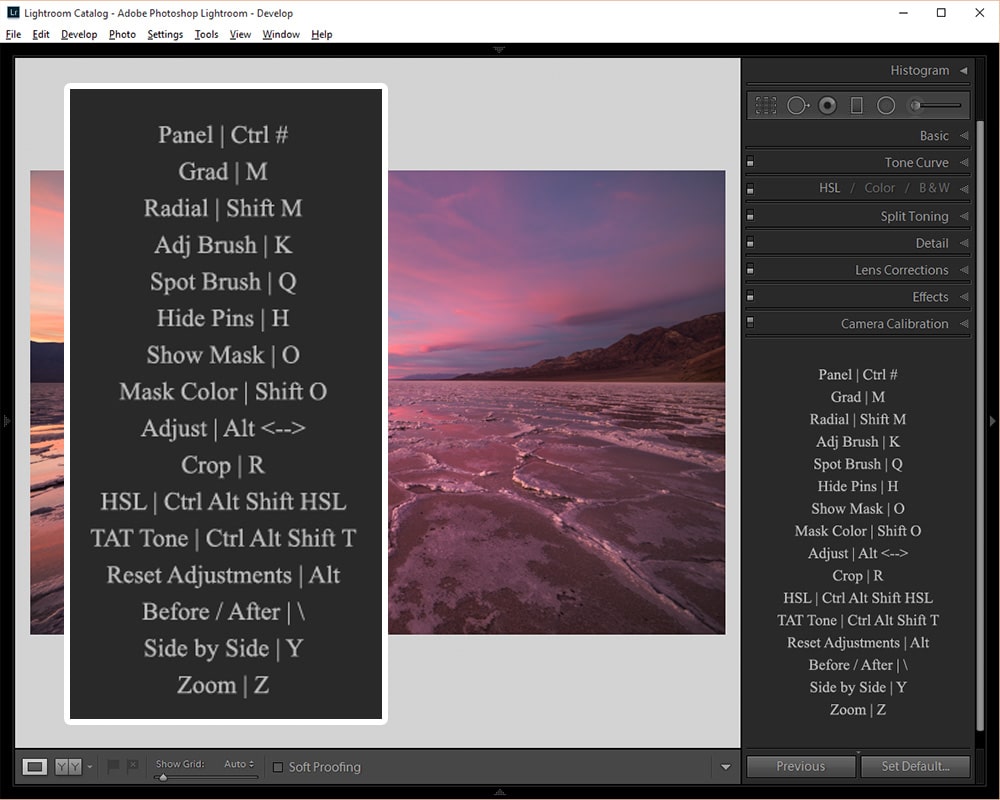
Struggling to remember all those awesome Lightroom keyboard shortcuts? Here’s an easy trick to display all your favorite shortcuts in the Develop Module:
First, in Photoshop, Illustrator, or another image-editing program create a text document (250px wide) with your favorite keyboard shortcuts.
Save the document as a PNG
Copy the PNG document to Lightroom’s Panel End Marks folder
In the Develop Module, right click in the empty space below all the panels and you should see your custom PNG available as a custom end mark.
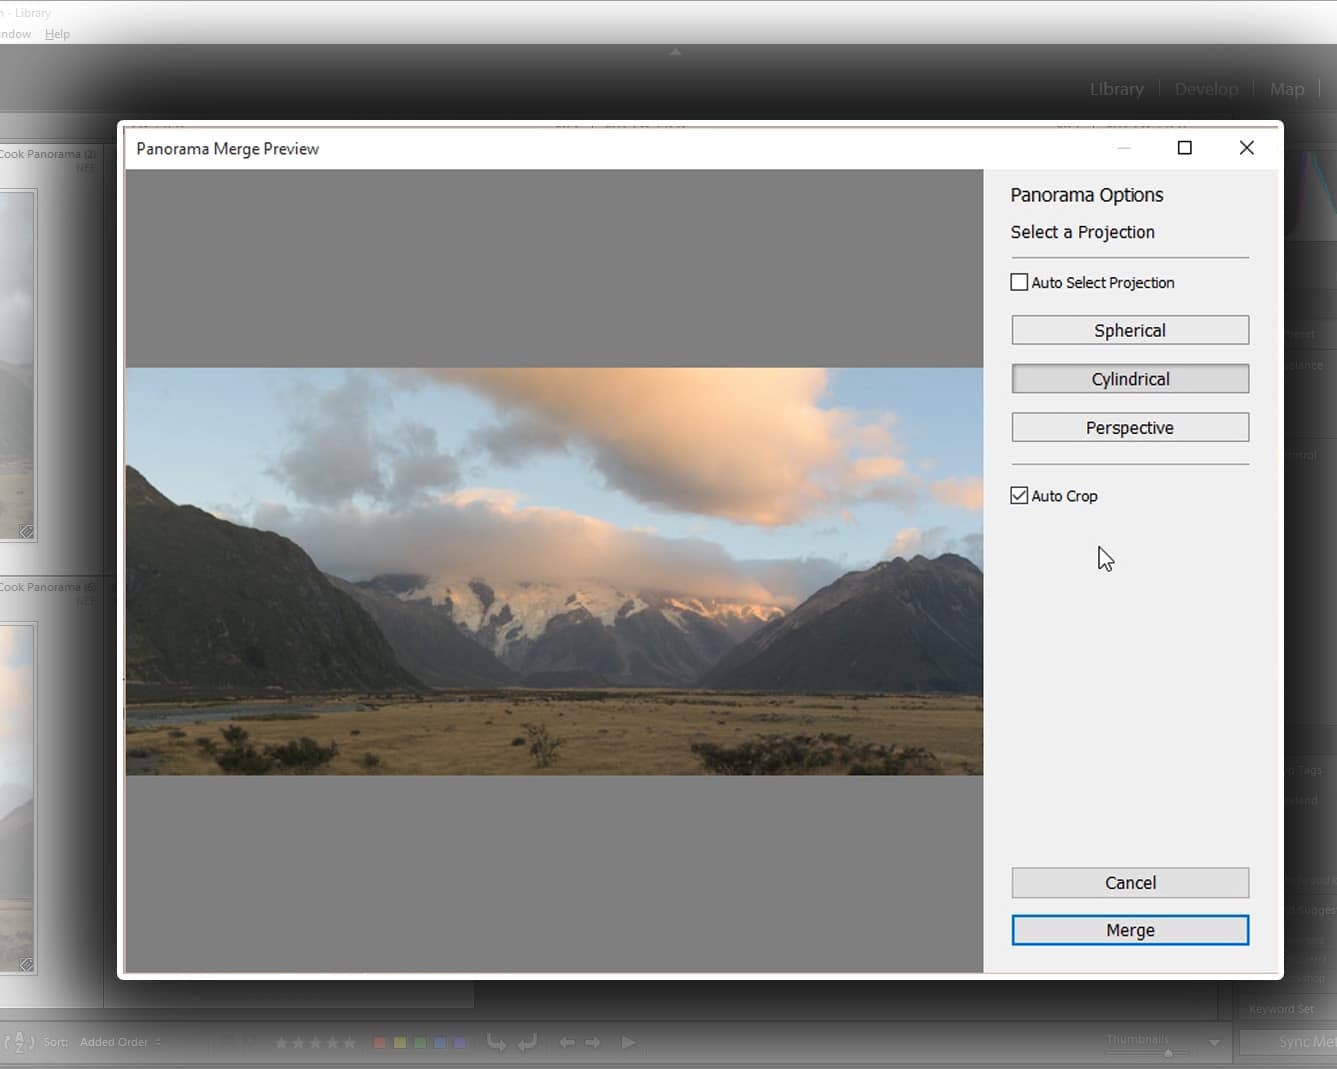
Lightroom CC (and ACR CC) now have the ability to create raw panoramas directly in the program. The resulting panoramas are DNG files and are completely editable in Lightroom as raw files. Learn how to use this powerful new capability, as well as some best practices and finer points of the tools.
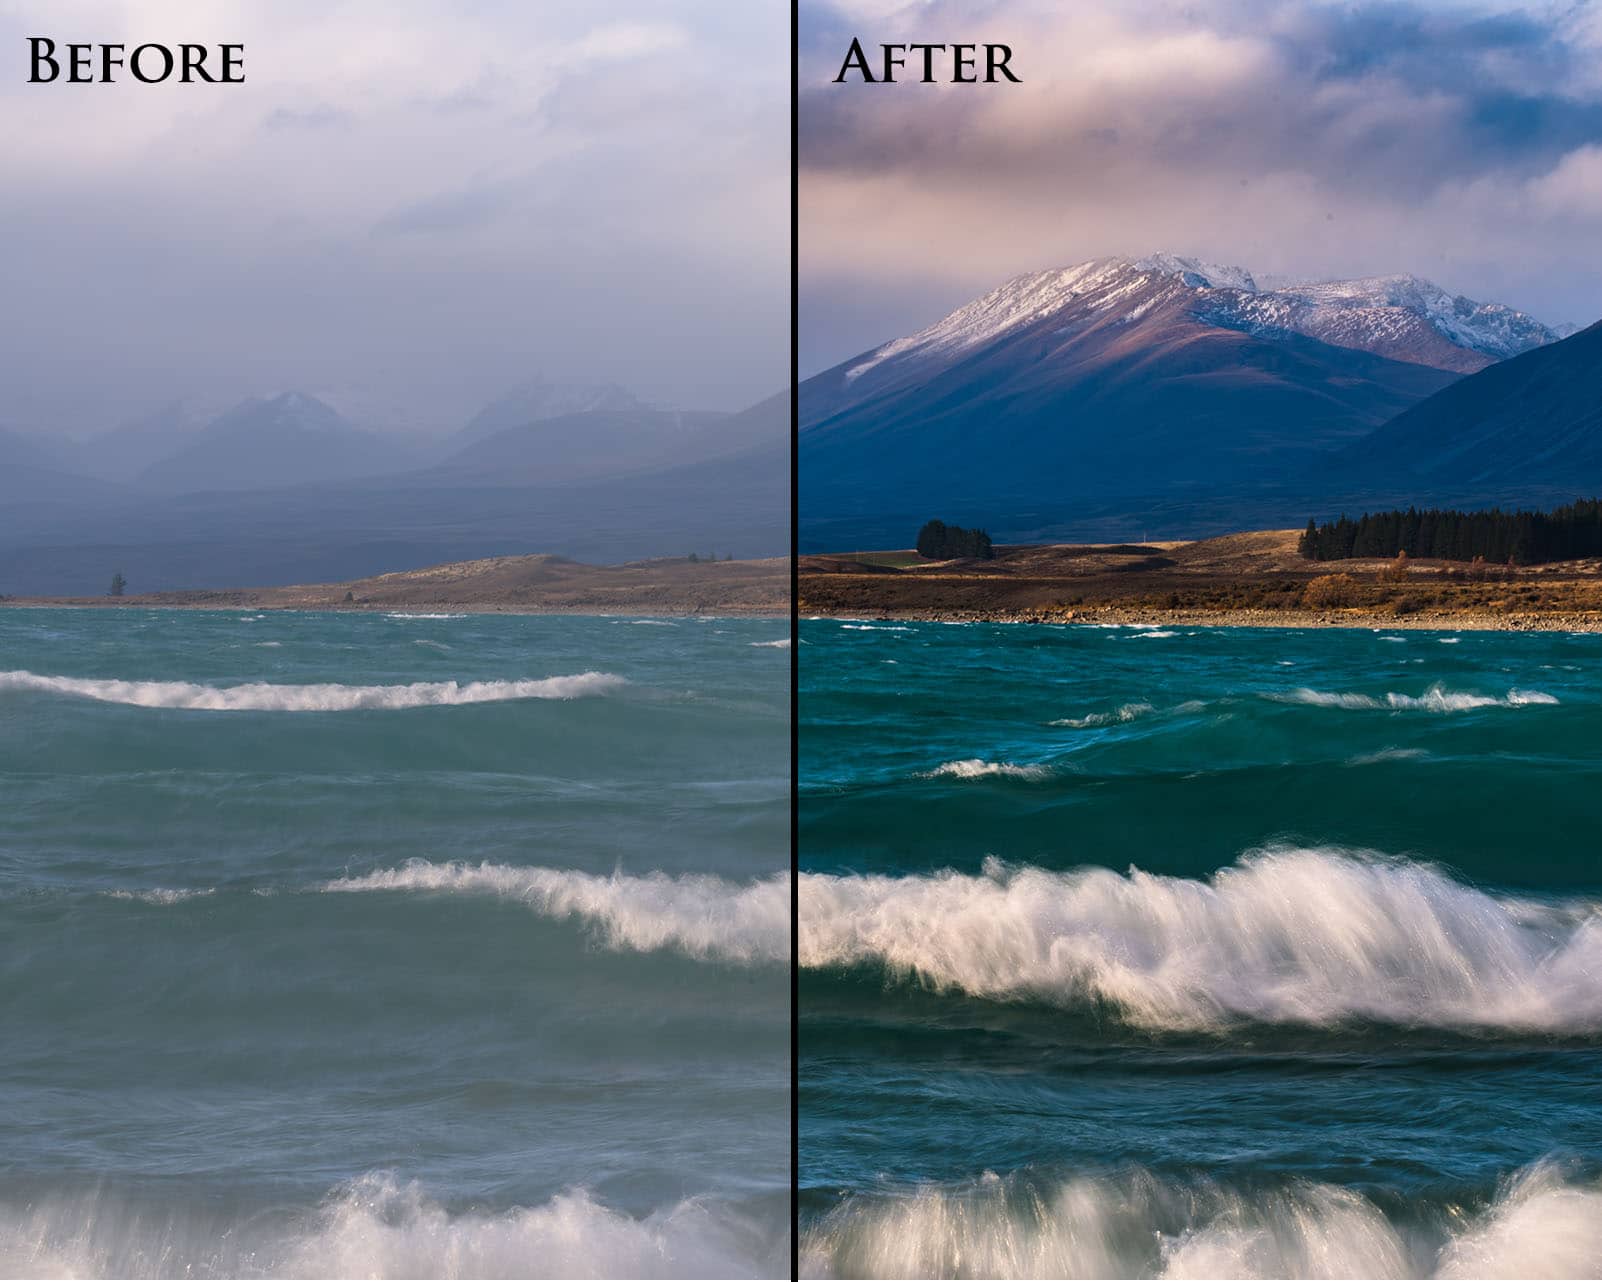
In this Lightroom workflow tutorial learn how to beautifully develop your landscape photos in less than 10 minutes. Learn to effectively use the tone curve, spot removal tool, graduated filters, and more.
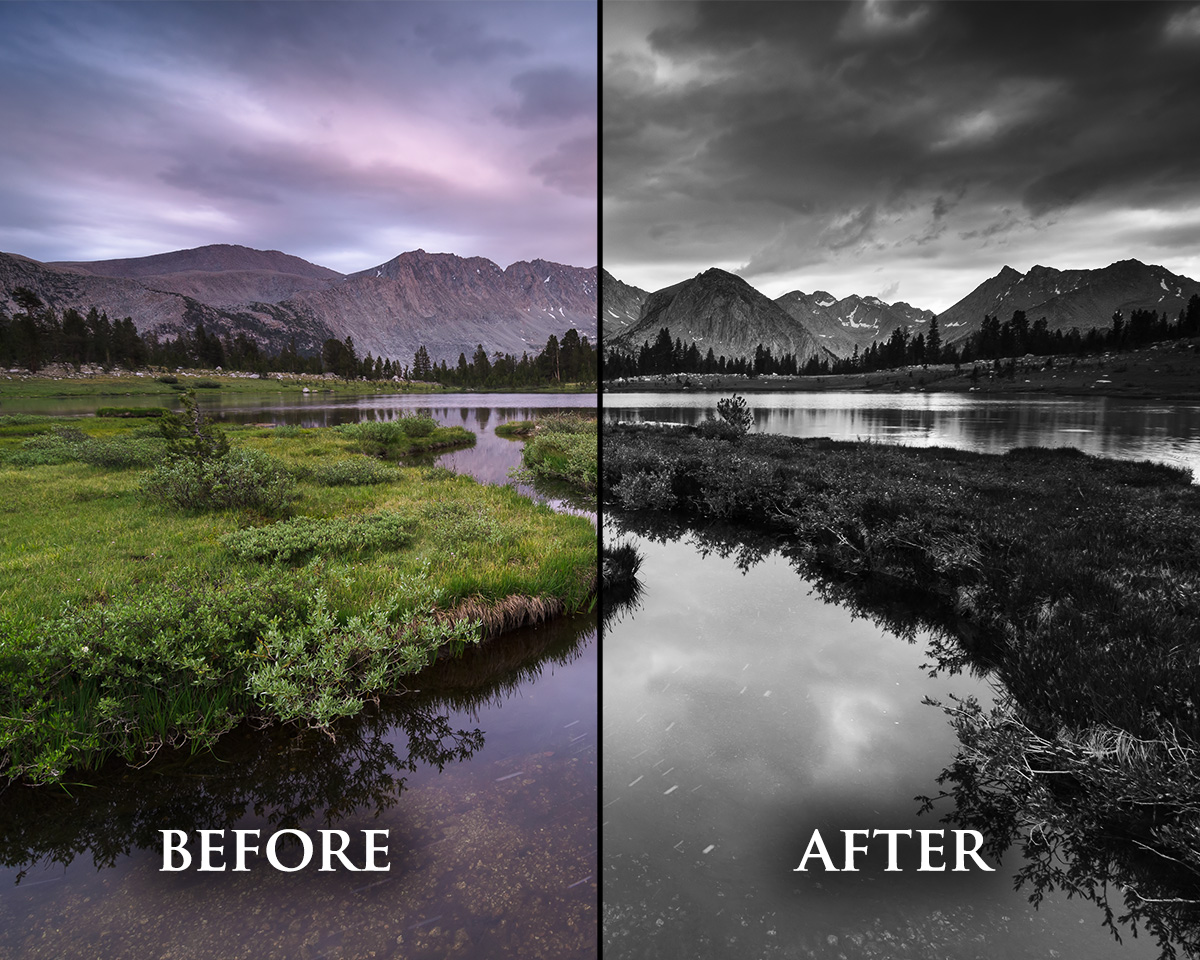
In the latest video from Pro Photo Tips, learn a unique, easy-to-use, and powerful method to convert your photos to black and white in Photoshop. No need for the clunky built-in B&W tool or expensive plugins.
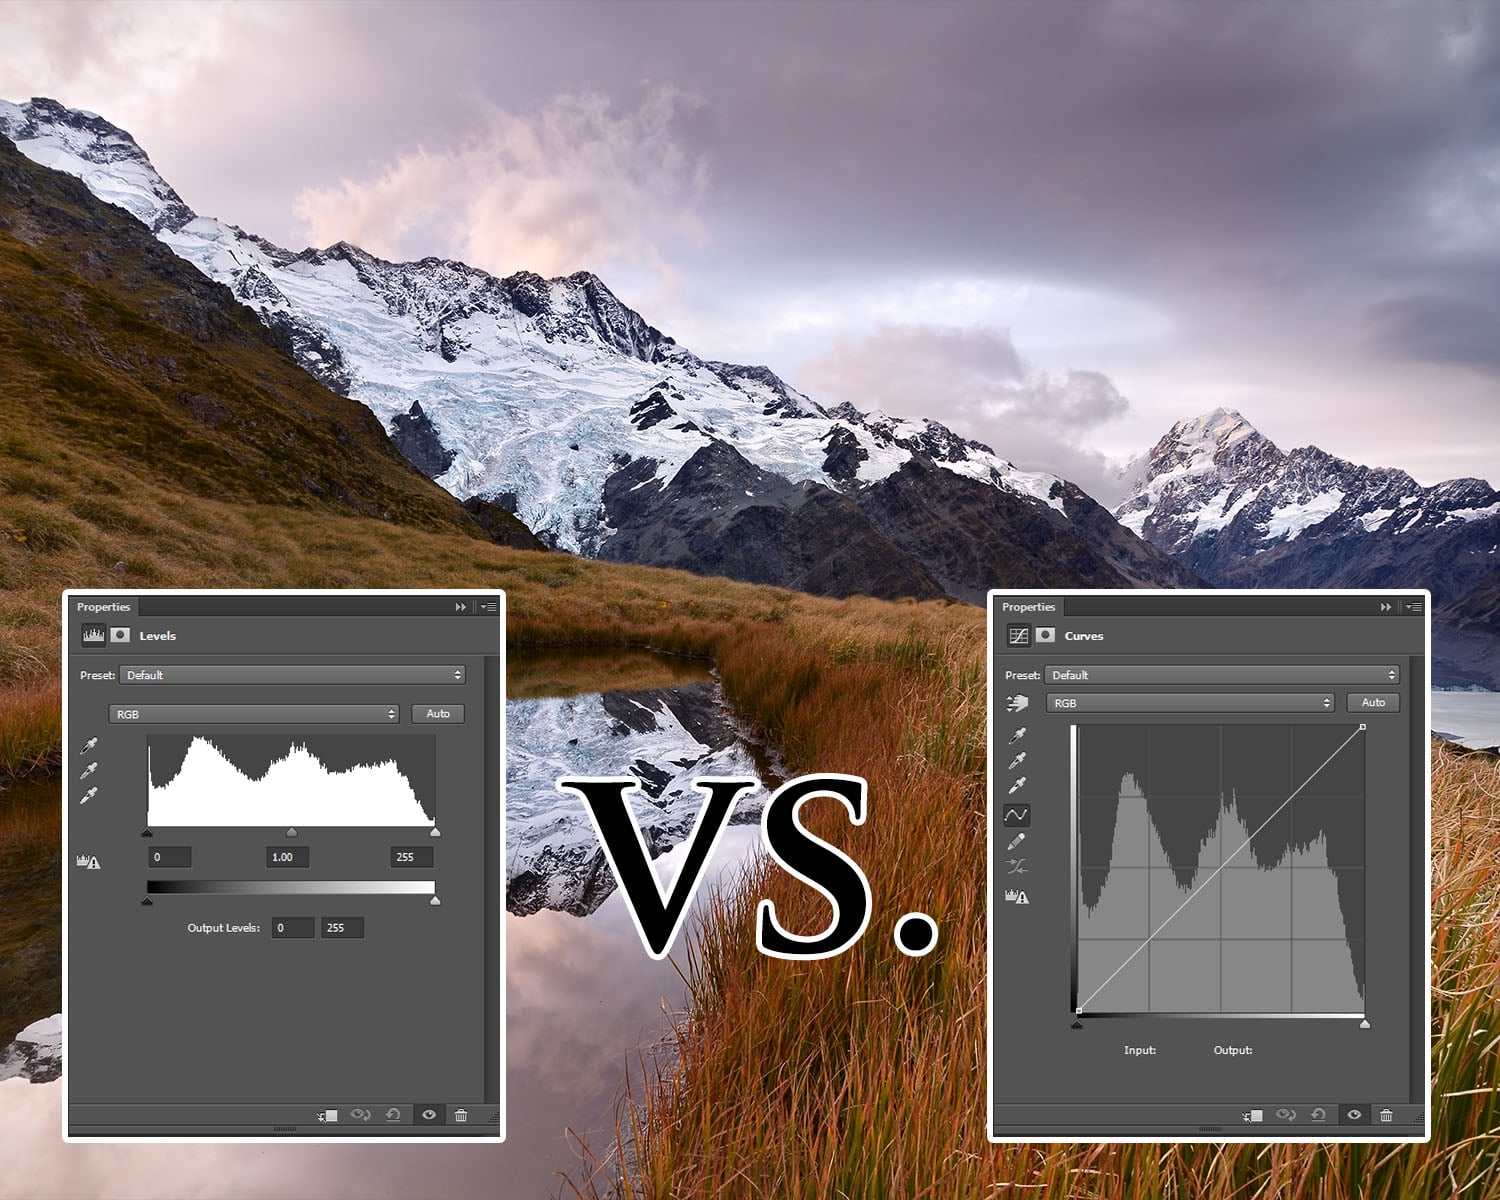
In earth’s history there have been some truly monumental matchups, the Greeks vs the Trojans, Gandhi vs Rambo, and a Tyrannosaurus against, uh, a bigger Tyrannosaurus. But there is one match up, and I’m not exaggerating at all when I say this, that eclipses them all: Curves vs Levels. Which is the best tool and which one should you use? Read on to find out.
The two most common tools for adjusting brightness and contrast in Photoshop are levels and curves. But is there a different between them, and is one better than the other? The answer to both questions is a resounding YES! but in order to understand why we need to take a look at how the tools work. Let’s start with levels.
Key Points of Levels:
Displays RGB histogram
Allows you to set black, white, and gray point for the image
Lets you adjust the zero point for color intensity, as well as the max point for color intensity
Can do contrast / brightness / color intensity adjustments
Can set max black and white values for image, creating a limit to the deepest blacks and brightest whites
Presets for quick adjustments.
That seems pretty robust already! What about Curves?
Key Points of Curves:
Displays RGB histogram
Allows you to set black, white, and gray point for the image
Lets you adjust the zero point for color intensity, as well as the max point for color intensity
Can do contrast / brightness / color intensity adjustments
Can set max black and white values for image, creating a limit to the deepest blacks and brightest whites
Presets for quick adjustments.
Hmmm, seems awfully similar to Levels! In fact, up to this point the two tools are essentially identical. But here’s where Curves stomps levels into the ground:
There’s no limit to number of control points you place on the curve and individual tonal ranges you can subsequently adjust
More user friendly with the hand tool, and a more intuitive interface (drag up to make brighter, drag down to make darker)
But the biggest on of all: unlike Levels, Curves preserves the white and black point of your image, allowing for tonal and color adjustments without clipping data
So since you can do everything and more with curves, use curves! Really the only reason reason to use levels is if you find the curves interface initially intimidating.
Do you know of a reason to use levels over curves? Let me know in the comments!
Rather than using the adjustment brush and gradient tools in ACR / LR you can often obtain more control over your images by double or triple-processing a single raw file and combining those separate edits in Photoshop. Check out the video to see how it’s done.
This website uses cookies to provide the best experience. You can adjust your settings here. Cookie settingsACCEPTRead More
Privacy & Cookies Policy
Privacy Overview
This website uses cookies to improve your experience while you navigate through the website. Out of these cookies, the cookies that are categorized as necessary are stored on your browser as they are essential for the working of basic functionalities of the website. We also use third-party cookies that help us analyze and understand how you use this website. These cookies will be stored in your browser only with your consent. You also have the option to opt-out of these cookies. But opting out of some of these cookies may have an effect on your browsing experience.
Necessary cookies are absolutely essential for the website to function properly. This category only includes cookies that ensures basic functionalities and security features of the website. These cookies do not store any personal information.
Any cookies that may not be particularly necessary for the website to function and is used specifically to collect user personal data via analytics, ads, other embedded contents are termed as non-necessary cookies. It is mandatory to procure user consent prior to running these cookies on your website.
Thanks for your order. Please wait a moment while we process your payment.