Transform Your Landscapes into Timeless Works of Art
Master the Painter’s Touch in Lightroom
Some photos show a place. Others make you feel it.
What if your photos didn’t just capture a scene… …what if they evoked the same awe and emotion as a masterpiece hanging in a gallery?
Welcome to The Painter’s Touch: Romantic Landscape Processing in Lightroom — a complete training that teaches you how to blend modern photographic technique with the timeless beauty of romantic landscape painting.
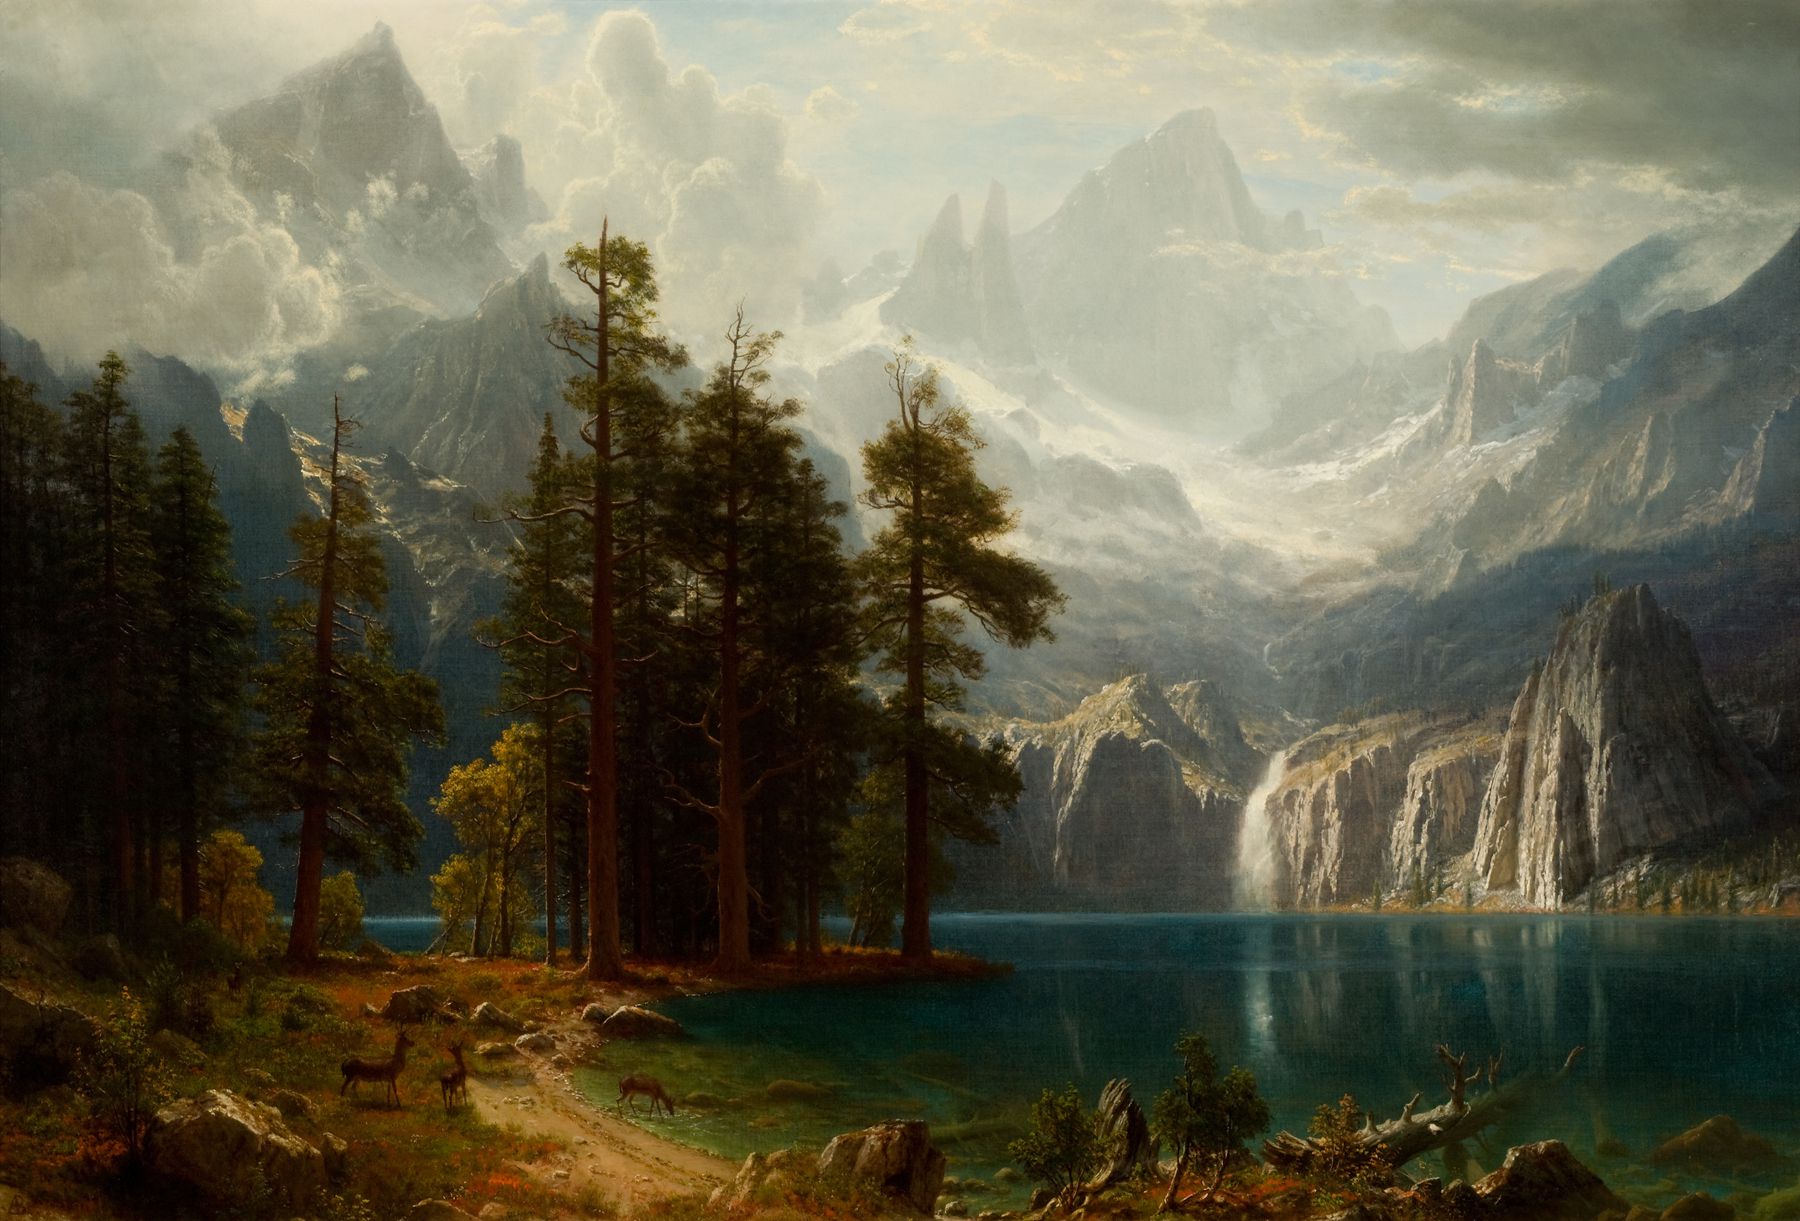
By harnessing the techniques created by masters like Albert Bierstadt, you’ll learn to create images that glow with sculpted light, breathe with depth, and exude elegance — all using tools you already have in Lightroom.
You open a RAW file and see more than just what the camera captured — you see the painting inside the photo.
With every adjustment, the scene comes alive: light spills across peaks, mist deepens in the valleys, colors sing in perfect harmony.
By the final brushstroke, you’ve created something that feels both timeless and uniquely yours.
That’s the power of the painter’s approach. And you can learn it.
Why This Course is Different
This is not about trendy filters, gimmicky presets, or over-the-top effects.
Instead, you’ll learn a deliberate, artistic workflow based on the principles that painters have used for centuries to create masterworks like this:
Light as Sculpture – Guide the viewer’s eye through the frame with intentional highlights and shadows.
Layered Depth – Create atmospheric perspective that makes your landscapes feel three-dimensional.
Color Harmony – Build rich, elegant palettes that enhance mood without overpowering the image.
Painterly Elegance – Refine your tones and details for a sophisticated, timeless look.
What You'll Learn
Romantic masters like Albert Bierstadt and Antoine Payen the Younger used 20 very specific concepts when creating their masterpieces. These 20 ideas allowed them to create depth, focal points, three-dimensionality, layering, color harmony, atmosphere, and drama in their paintings.
The first lesson in the course breaks them down one by one. The techniques are simple and can be understood in a few minutes.
Then following along with the included raw files to apply the techniques to photo after photo. You’ll learn how to utilize the techniques and ideas in a wide variety of photos, from mountains to rivers to forests and beyond.
In short, this course teaches you how to apply those specific 20 techniques to your own photos to go from boring raw files to romantic works of art.
Light
Learn how to harness light and shadow to deliberately create multiple layers of dimension in your shots, avoiding flat, tonally-dead photos. Understand the important qualities of light that lend themselves to painterly images.
Detail and Atmosphere
Understand how to minimize extraneous clutter and add detail only where it’s needed. Learn the incredible power of atmosphere and how it yields tremendous depth and feel in your photos.
Color and Mood
The old masters used very specific color palettes to add drama and nostalgia to their masterpieces. Learn to utilize these same kinds of palettes for a timeless feel.
Make Your Raw Files Glow and Subjects Pop
You’ll learn the techniques the masters used to apply glow and interest to the most important parts of their images. Learn how to emphasize and enhance the existing light in a scene to showcase what’s most important.
Picture This…
You open a photo from your last trip. At first, it’s flat. Lifeless. Just a snapshot. But as you apply The Painter’s Touch, the magic happens:
Light spills across the peaks. Mist deepens in the valleys. Colors sing in harmony. The whole image breathes with depth and elegance.
It’s no longer just a photograph — it’s a work of art.
9 Step-by-Step Video Lessons – Watch as entire images transform from flat RAWs into painterly landscapes.
Instant download - the whole course is available for you to download as soon as you check out.
Downloadable raw files – Edit alongside me for hands-on learning.
Over 2 hours & 30 minutes of painterly processing instruction in Lightroom.
Guided learning at your own pace. You can start and stop the course whenever you like, watch lessons as many times as you want, and skip around in the course curriculum.
Lifetime Access – Revisit the lessons anytime, forever.
9 Chapters
Intro: Painting Analysis
In this chapter you will learn the 20 specific ideas and techniques the romantic era painters used to create depth, focal points, three-dimensionality, layering, color harmony, atmosphere, and drama in their paintings.
Lesson 1: Backlit Mountains
In this lesson, follow along with the included raw file to understand how to apply the techniques from the romantic painters’ masterpieces. Increase depth, enhance and place light and detail exactly where it’s most important.
Lesson 2: Sunset at Elephant Rocks
In this lesson we’ll focus on enhancing glow and a specific light source to illuminate the image, keeping detail and interest just where it’s most important.
Lesson 3: Midday Forest and Clouds
We all have 1000 photos like this: bright, backlit clouds and dark tree trunks. It’s beautiful to the eye, but is the photo salvageable? You bet it is! Harness the power of the masters’ techniques to showcase the light in certain parts of the scene, and use specific tonal strategies to enhance depth in the scene.
Lesson 4: Mono Lake
In this video you will learn to apply our painterly techniques more selectively to affect certain parts of your photo more than others for even more control.
You will also learn how to reduce visual clutter in less interesting areas.
Lesson 5: Fall Color Creek Scene
Learn to completely harness the light in your photo to direct your viewer’s attention and create as much dimensionality as possible. Minimize clutter and enhance color contrasts for harmonious, balanced images.
Lesson 6: River Sunset
The old masters used very specific color palettes to add drama and nostalgia to their masterpieces. Learn to utilize these same kinds of palettes for a timeless feel.
Understand how to enhance color contrasts and color luminance, and enhance the existing light in the scene for elegant, glowing photos.
Lesson 7: Mountain Morning
The classic sunset/sunrise challenge: what do you do when half the scene is in sun and the other half in shade? HDR, grad filters, blending?? If we pull from our painterly toolbox you’ll find an even more elegant solution that involves deliberately utilizing the light and shadow in the scene to create a dark base which allows the important parts of the scene to really pop.
Lesson 8: Midday Mountains
You’re out hiking in broad daylight and see a beautiful scene: of course you take a photo but in the back of your mind you’re already thinking, “eh, the light is too harsh, it’s just going to be a snapshot.” Not anymore! In this video you’ll learn how to avoid flat, soulless snapshots and turn those midday photos into rich, timeless images full of color and life.
Who This Is For
This course is perfect for:
Landscape photographers who want to move beyond “pretty” into powerful and evocative.
Lightroom users who want more control and artistry in their edits.
Photographers inspired by classic art and the romance of the natural world.
No advanced Photoshop skills required — everything happens inside Lightroom.
Frequently Asked Questions
How long do I have access to the course?
How does lifetime access sound? This course is downloadable, which means you have instant, unlimited access to this course for as long as you like, across any and all devices you own.
Can I download the course videos, PDFs, and bonuses?
Absolutely! Every demonstration, raw file, and PDF is available for you to download.
What software do I need for this course?
A computer with Adobe Lightroom Classic (Creative Cloud version).
Can I pay with PayPal?
Yes you can. You will see the PayPal option on the checkout screen.
What if I am unhappy with the course?
I have a full 30-day refund policy. If you have completed at least three lessons and are unsatisfied with your purchase contact me and I will give you a full refund.
30-day “If I can’t teach you photography I don’t deserve your money” guarantee
I’ve helped thousands of people improve their photos. Here’s how I can help you.
I’ve been teaching photography for over 15 years. In the beginning I was teaching only myself. But as I began to understand what made a good photo I quickly moved on to assisting other photographers on their workshops, and then to teaching my own. Since then I’ve instructed thousands of photographers in person in some of the most beautiful places in the world.
But I didn’t stop there. I also created Joshua Cripps Photography (now the Nature Photo Collective), one of the most popular photography channels on YouTube, which has over 400,000 subscribers and 10’s of millions of video views.
Throughout these years of teaching (as well as refining my own photography) I’ve learned a lot about what makes a good photo and what doesn’t.
I’ve also come to realize when you’re learning post processing you need more than just endless tips and confusing techniques. You need practical approaches, step-by-step processes, and go-to ideas about how to craft a winning image. You need a framework to start from that you can build your own creative ideas off of.
That’s why I created The Painter’s Touch. To give you a repeatable process you can use to create powerful, elegant photos using the tools available in Lightroom.
This course lays out the process in black and white. There are 9 lessons teaching you a complete painterly processing workflow.
Loved By Photographers
Hi Josh, [This was] an informative and helpful perspective on the most important of photographic topics: composition. And worth it for the solid gold that is Part 4 alone.
After photographing for eleven years and participating in over 30 pro-led multiday and one day workshops, (several of Josh’s), I was skeptical. Really there is always something to learn or reinforce about nature photography. The take away I MUST remember is to look at all the angles of a scene and pay attention to what is under my feet that could be an interesting foreground. Thanks, Josh, for taking me on your mind’s eye journey to capturing those mind-blowing photos.
Hi Joshua,
You do not know me, but my husband and I follow you.
I am completely blown away! The time and effort you took to put words to your careful and creative ways of approaching the making of a compelling landscape composition is commendable. [It] is absolutely clear, incredibly helpful, and delightfully uncomplicated. It is additionally accompanied by excellent photographic examples of exactly what you are describing.
I am truly inspired to go out and make photographs that are genuinely mine – not ones I loved that someone else made. I find landscape photography to be very challenging (in a good way) and very addicting at the same time. You just blessed me with this clear, concise, and inspiring instruction for creating powerful landscape compositions!
Thank you so much – hope to head for the Eastern Sierras in October and Yosemite in November ready to apply!
Hi Joshua,
Not only are you a great photographer, but more importantly to me, you are a great teacher. I have been impressed with the depth, organization and content of your zoom presentations that I have seen. Consequently, I am not surprised by the quality of [Landscape Composition Secrets].
I like the approach that it’s not about the rules, but instead it is about a process. It is [given] in a friendly conversational way that keeps your attention. It emphasizes the point of not planting your feet in one place, but moving around to identify photographic elements to help you visualize how to combine them for a powerful image. I really appreciate the multiple images of the same area, that Joshua uses to show his thought process to select a perspective to photograph.
Hi Josh,
I enjoyed seeing how you think and reason out possible compositions. Often my head gets clogged up with the rules and tips, just making the process more difficult, more time consuming and honestly starts to take the fun out of it. I am an enthusiastic hobbyist living in New Hampshire, and really enjoy going out in nature and seeing what there is to see. I will begin to apply what I have learned and I'm thinking it will make my outings that much more enjoyable.
Thanks again Josh, keep up the great work!
Thanks so much for this, Joshua…
Really good information for making composition more deliberate…
This will change the way I work when I’m out in the field!
This is an excellent...approach to visioning and composing good images. The basic suggestions and steps you outline in the book are appropriate for beginning as well as advanced photographers. The example images are excellent accompaniments to the points you make. As expected, you have done a great job of sharing insight into your talent and depth of creativity to those you inspire.
BEAUTIFUL PROCESSING
DOESN’T HAVE TO BE A MYSTERY
Stop wishing for better photos and get started today. The Painter’s Touch will walk you through a proven process for crafting gorgeous, painterly photos. You’ve already spent thousands of dollars on your camera, lenses, tripod, and accessories. Now invest in the skills and techniques to bring your artistic vision to life.
This website uses cookies to provide the best experience. You can adjust your settings here. Cookie settingsACCEPTRead More
Privacy & Cookies Policy
Privacy Overview
This website uses cookies to improve your experience while you navigate through the website. Out of these cookies, the cookies that are categorized as necessary are stored on your browser as they are essential for the working of basic functionalities of the website. We also use third-party cookies that help us analyze and understand how you use this website. These cookies will be stored in your browser only with your consent. You also have the option to opt-out of these cookies. But opting out of some of these cookies may have an effect on your browsing experience.
Necessary cookies are absolutely essential for the website to function properly. This category only includes cookies that ensures basic functionalities and security features of the website. These cookies do not store any personal information.
Any cookies that may not be particularly necessary for the website to function and is used specifically to collect user personal data via analytics, ads, other embedded contents are termed as non-necessary cookies. It is mandatory to procure user consent prior to running these cookies on your website.
Thanks for your order. Please wait a moment while we process your payment.
 Skip to content