Stop Trying To Be A “Better” Photographer

Stop Trying To Be A “Better” Photographer

This is going to sound really weird, but one of the biggest mistakes I see with landscape photographers is that they’re constantly trying to get better, but this hand wavy a morphous pursuit of better can actually kill your progress as a photographer. And I’m going to tell you why right now.

Greetings my excellent friends. It’s Josh Cripps here. Now. Obviously I’m not against people progressing and trying to become more successful photographers. My problem is with the concept of better. And the reason that I really don’t like this concept is because better is not a destination. It’s not a place you can actually get to with your photography. And therefore it’s impossible to create a plan or a system to get there. How do you know, 100% for sure when you’ve become a better photographer? Now you might look at a photo from a year ago and a photo from yesterday and say, Oh, well, the one from yesterday is better. So I’m a better photographer, but how do you know for sure that it’s not just because you had really rad conditions yesterday, or you got lucky with your camera settings or your composition without pointing to something specific, you can’t actually know if you’ve achieved better. So what’s going on here?

What happens when photographers try to get better is that they attempt to digest all of the information that’s out there about photography. They read every blog article they can find, and they watch every random YouTube video from every photographer who has a channel like me and they absorb and absorb and absorb and absorb information. And you know what happens? They become utterly overwhelmed and paralyzed by the amount of completely meaningless information that they’re trying to digest. And the actual transformative learning process screeches to a halt. And I know this because I did this for years. Do me a favor and think about every article you’ve ever read about the best lenses for landscape photography. Invariably, the author says something like

Sometimes, or like to use my ward. I ain’t go names, but in other situations I love boy Turner photo nodes, and then Stillwell situation. So I think the mid range managers best cool.

How does this help you in any way? Is this kind of information, getting you to an actual real end point where you can say, Hey, look, I achieved my goal of doing this. No, absolutely. It’s not what this kind of information actually does is put you into the field full of photography, anxiety. As you’re trying to remember every single little tidbit from all of those articles about when this expert said he likes to use a word wide lens, or when that expert said, she likes to use a telephoto lens. Let me think about it this way. Imagine that you want to learn Spanish so that you can travel through South America. So you attempt to digest and absorb as much general Spanish as you can before the trip. Then when you get to the bus terminal in Santiago, Chile, you’re struggling to remember if ticket is masculine or feminine, if you should be using the light conjugation or not.

And if you make a bus trip, take a bus trip or do a bus trip and you sit there stammering at the ticket window, cursing yourself for not prioritizing learning specific travel related phrases. Not that I’m describing an actual situation that I’ve been in, of course not this generic absorb as much as possible, kind of learning is extremely inefficient and it almost never helps you achieve what you want to achieve either as a photographer or as a person. So what should you do instead? Well, the answer to this, this is really simple. You need to set clear specific goals for your photography. Pick one thing that you would like to learn and work toward that one thing. For example, I want to learn how to shoot long exposure, or I want to learn how to shoot seascape photography. Don’t try to learn astrophotography and abstract photography and macro photography and luminosity masking all at once.

You’re just going to overload yourself and you’re not going to make any progress in any of those things. So pick just that one thing that’s most important to you right now, and even more critically make the goal as specific as possible with a clear outcome that you can point to and say yes or no. I have accomplished my goal period, for example, eight fantastic photography goal. Instead of I want to be better is I want to learn how to get my entire photo in sharp focus from front to back every single time. Or I want to learn how to use two flashes to create Rembrandt lighting for headshots, or I want to learn how to get that smooth water. Look when I’m photographing waterfalls, notice how with each of these goals you can definitively say yes or no, whether you’ve accomplished it, having a clear outcome like that is absolutely crucial to understanding the right path that you need to take to achieve that goal.

Now, setting goals is just one of the things that you need to do in order to transform your photography, to the point where you are or shooting photos that you want to shoot, where you love the photos that you’re shooting and you know exactly how you shot those photos. In my opinion, there are four other that you need to do as well. And I’m going to talk about those in another video. So be sure to subscribe to the channel, to see that one in the meantime, if you want to know what those four things are. In addition to setting clear goals, I have a free webinar that you can check out. That’s all about my approach to photography and the step-by-step systems that I use when I’m out in the field shooting only get up there in the corner, or you can check it out in the video description down below that is going to do it for this one. So thank you guys as always for watching until next time have fun and happy shooting.

Share This Article:

Facebook
Twitter

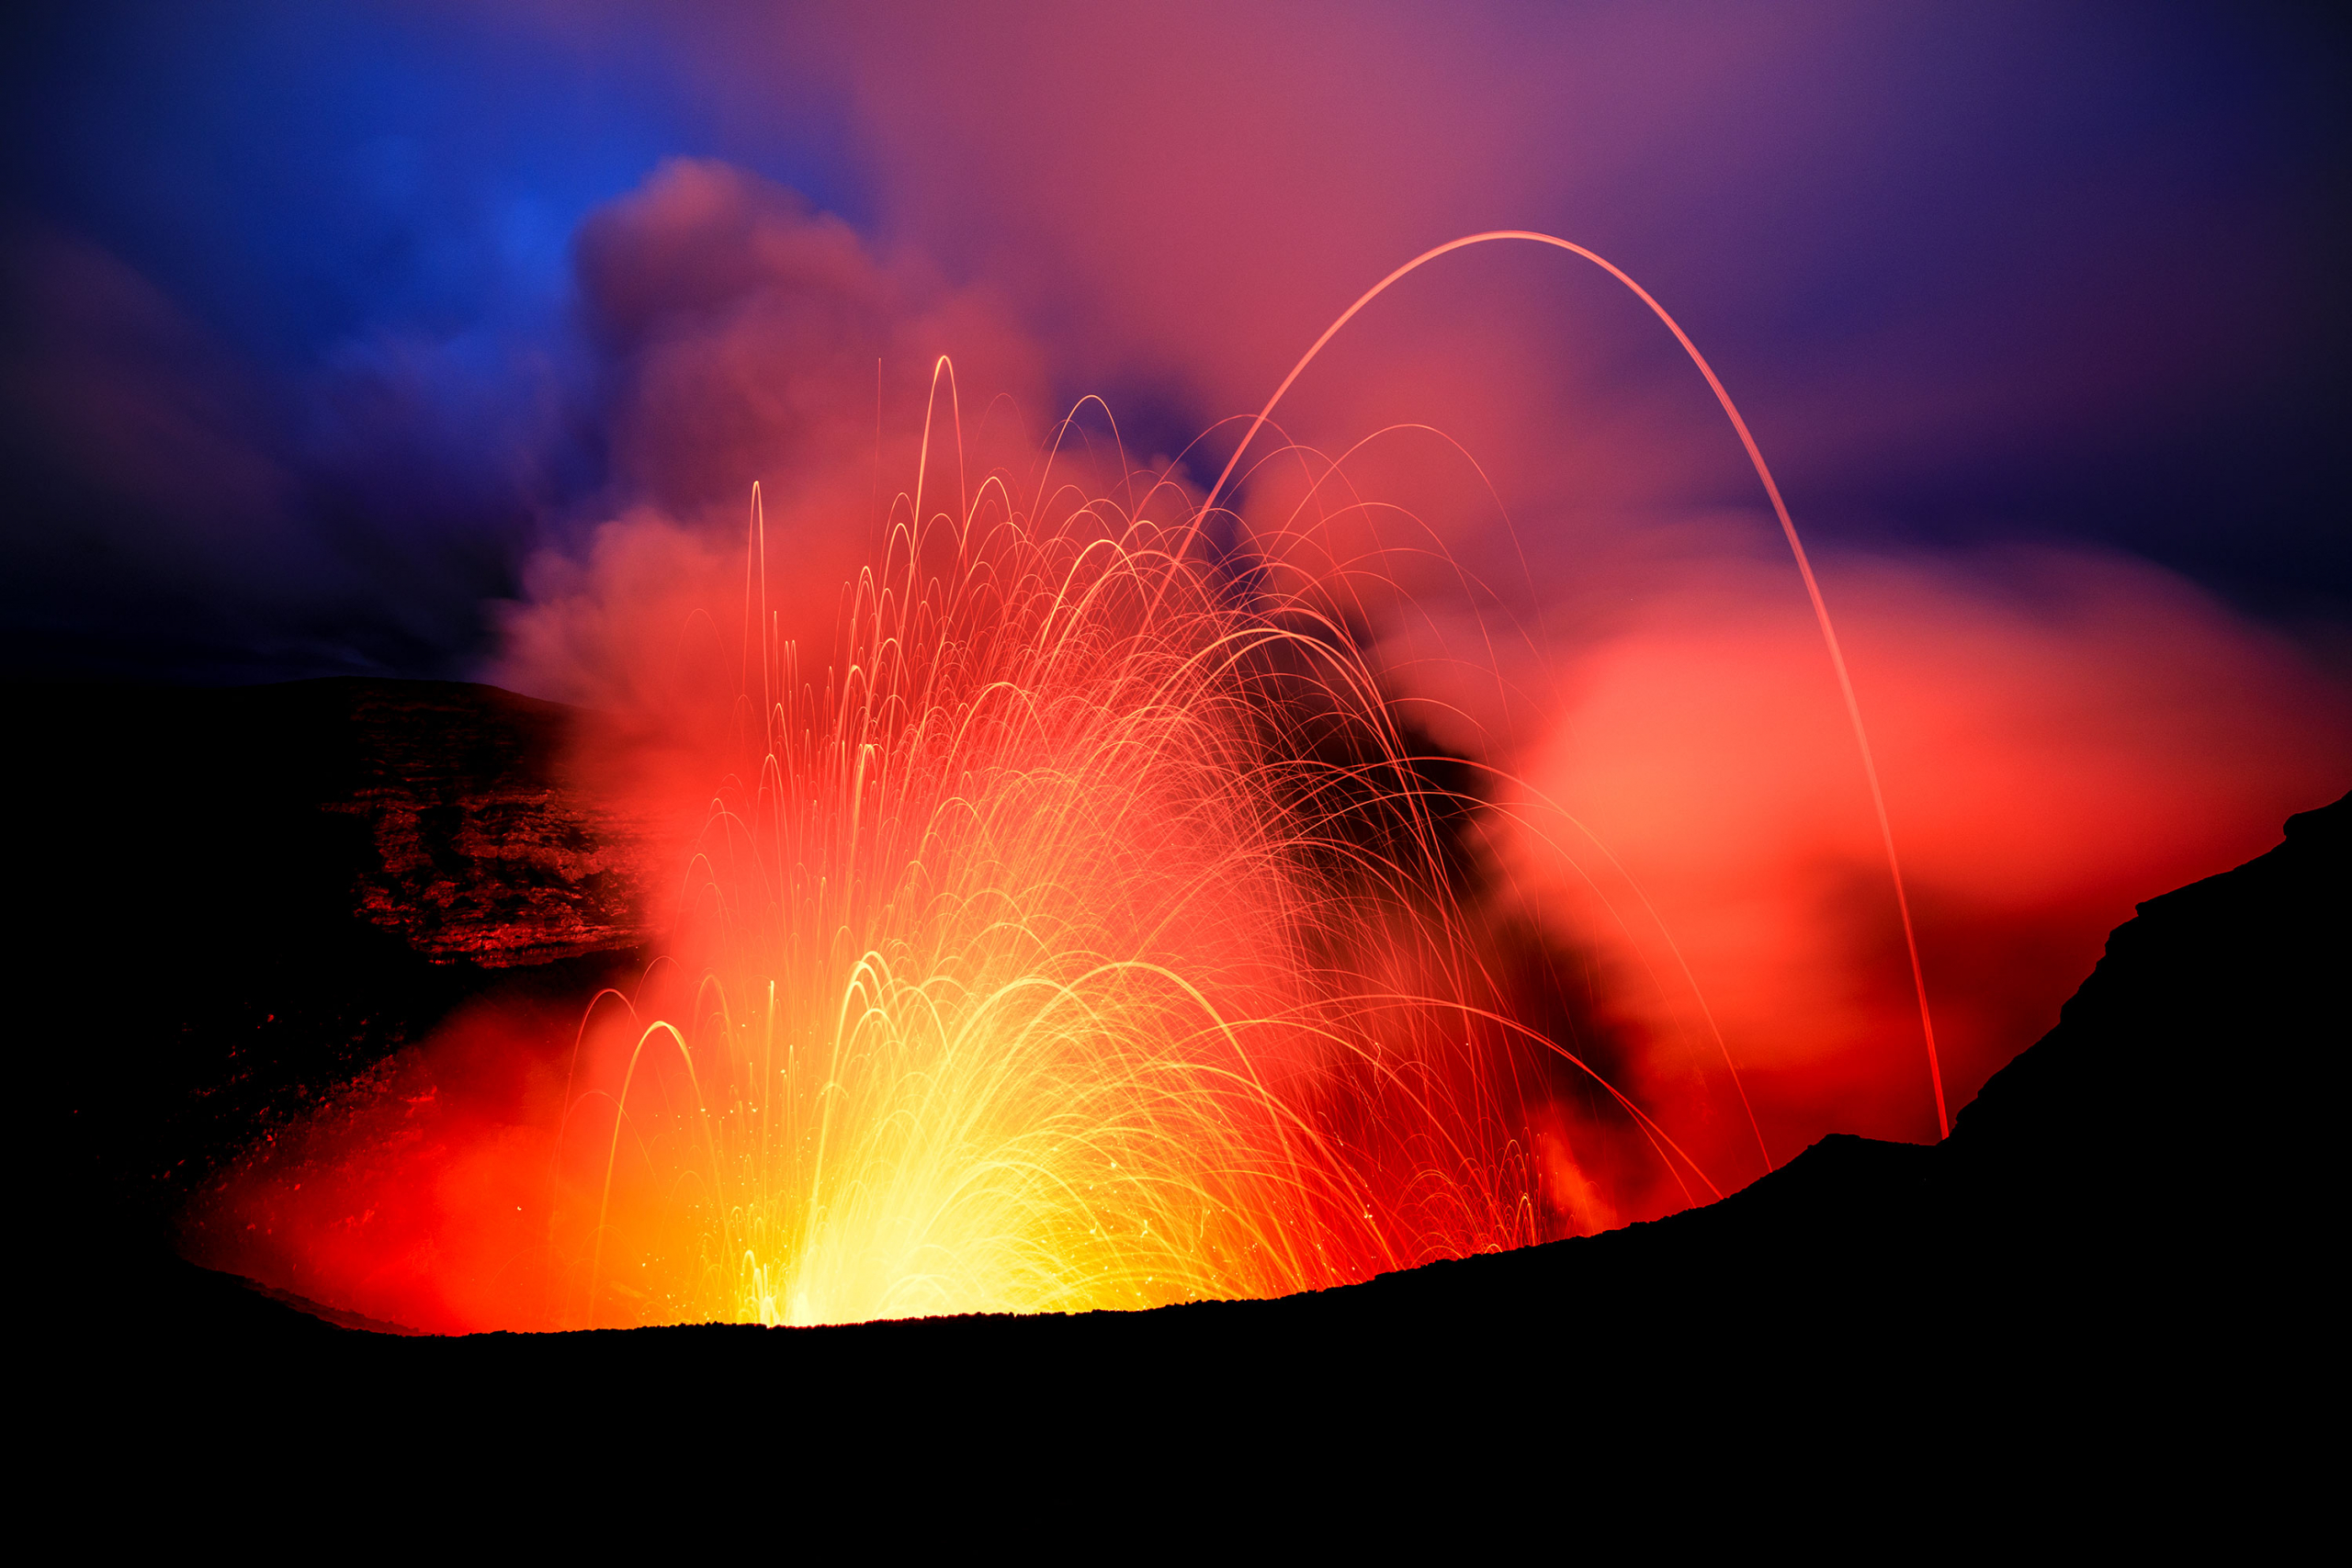
Photographing Volcanos With Landscape Pro Ian Plant

Photographing Volcanos With Landscape Pro Ian Plant

Right. You always gotta be thinking about how you can take things up to the next level. You can’t just rest on your laurels. If you want to make really compelling photographs.

Greetings my excellent friends. It’s Josh Cripps here on this episode of how I got the shot. I’m very excited to welcome a special guest. One of the best landscape photographers in the world, and someone I’m proud to call a personal friend, Ian plant. I’ve been following Ian’s work since the very early days of my own career. And one of the things that has always impressed me about his work is his dedication to the shot. Once he’s got an idea for an image, no matter how crazy or adventurous it is, he goes for it. And he does what it takes to execute his vision. And the photo he’s going to be telling us all about today is no different a magnificent portrait at this volcano, but I’m gonna let him tell you all about it. So without any further ado, let’s dive in ed plant. Welcome. And thank you so much for joining me here on how I got the shot. How are you doing today?

I’m doing great. Thanks so much for having me, Josh. It’s a real honor and privilege to speak with you as always.

Hey man, it’s absolutely my pleasure. And I’m so stoked to talk to you about this photograph because you didn’t give me an idea in advance, what you were going to be talking about, what photos you’re going to be showing. And when these volcano images popped up on my screen, I just had to hear the story there’s so much going on in these photos that, that we could talk about, not just the technical aspects and the exposure, but also the colors, the composition, the whole story behind it. I can’t wait to get into it. So I’m going to turn the ball over to you. Why don’t you just get us go and tell me what the heck are we looking at? Where is this and how did you get there?

Well, this is a great story. In fact, it’s an explosive story. See what I did there, a little volcano pawn. So this is actually a sequence of photos. I wanted to share with everyone, my process, as I explored this beautiful volcano, this volcano is in the Island nation of Vanuatu in the South Pacific. And it is literally halfway across the world. From where I live. It was quite an adventure getting there. And I spent a week photographing this volcano. And with this subject, like with my other landscape subjects, I usually spend a fair amount of time trying to understand the subject, get in tune with its rhythms and to really assess what the creative potentials are. And usually what happens is my work goes through this iterative process where one shot, you know, just kind of leads to the next. And so instead of just showing one image and explaining how I got it, I thought it might be fun to go through the series of photos that I took while I was there for one week photographing.

And so it’s really interesting because you get to this remote Island in the middle of the South Pacific and the, uh, scenery is pretty much dominated by this one, giant massive volcano and it’s, and it’s really quite huge. So the first photo I’m sharing here is just a reference photo, and this is a shot I took with my drone after climbing up to the top of the volcano. I launched my drone and flew it up as high as I could looking back down just to give a sense of scale. This is a huge, huge landscape, uh, feature. And this is volcano. Crater is probably, I don’t know, at least a half a mile or a mile across. And you can see there’s these lava pools down at the bottom and they look quite small in this picture. That gives you an idea how big this volcanic crater is.

So that love of pool on the left. In this first photo, you can see the smoke rain coming out of it. That is an explosion that is just happening right there. So there’s magma coming out of this lava pool and it is going hundreds and hundreds of feet into the sky. And it looks very, very tiny. And this smoke ring that you’re seeing coming out of that lava pool is hundreds and hundreds of feet across. I mean, I don’t even know how big it is. It’s just this massive plume of smoke that I saw when I was standing there on the crater edge of the volcano, but from the distance with my drone, it looks very small relative to the overall size of the landscape. So this is just an odd, inspiring humongous landscape, which presented a huge challenge photographically.

Now, how do you get to this? You hike up there or is it, uh, you have to take a guide or a donkey or a horse, or what’s the story like, how do you actually get to the rim there to observe this incredible landscape?

So what I did is I stayed at this little lodge, this Villa that was right below the, uh, the volcano. And, you know, I could see the volcano from where I was. And from there you go into the volcanic park and you hire a guide and the guide takes you up in like a four by four vehicle and you can park below the crater rim and then you have to climb several hundred feet up to the top of the crater rim with your guide. And there’s actually a fair number of tourists that go there. And so in the evening there might be another 30 or 40 people going up there with you. So it’s quite the tourist event, but you could also go up in the early morning before sunrise. And I did that a lot. And typically there were, there weren’t really any other people then. So a lot of times I’d be up there by myself with, uh, with my photo buddy, who I was traveling with. We’d be up there all by ourselves in the morning. And it was really incredible to have that this, this amazing natural landscape, this amazing event, all to ourselves.

That sounds utterly unbelievable. It’s such a primal landscape. So tell me as you come up to the creator for the first time and you’re looking down and you’re seeing this magma and these, and you’re hearing this and feeling, uh, what, what do you, what are your sensory experiences? Like? What does it smell? Like? What does it sound like? Do you feel anything in your chest and how does that start to guide the process for you of coming up with an idea for a photo that flowed downhill into this final image?

Yeah, it’s interesting. Cause I really didn’t know what to expect. I had seen a few photos from this location, but it’s not exactly on the map for most photographers. It’s kind of Terra incognita. And so the first experience you have is sound because as you’re climbing up, you hear these explosions that are going on. What’s really unique about Yasir volcano is that it basically erupts everything that it’s, it’s very predictable and the eruptions are the result of magma building up in these lava pools. As the pressure builds up, it releases in this giant explosion that just causes all these magma bombs, do a flying hundreds and hundreds of feet into the air. And so as you’re climbing up, you can’t see anything, but you can hear those explosions. So you hear these, this banging noise, it’s kind of like distant artillery, like maybe a cannon going off or something like that.

And then when you get up to the top of the rim, you’re not really able to look down and see the lava pools from where you’re standing, but every few minutes suddenly you feel this wave of pressure passing you. There’s a shock wave. There’s the sound of the explosion. Uh, so the explosion sound comes first, then the shockwave passes and you can just feel the pressure in your chest. And then you see these giant magma bombs, uh, coming up above the crater rim and just flying in the air in front of you, hundreds of feet above you, it’s really quite a stunning sight. And it’s quite a stunning thing to be just standing there when it happens. It’d be like the noise of the explosions. If you’re not paying attention, it could, uh, it can startle you. And as I said, you could feel it, that sound wave passing through you. And it’s quite an incredible feeling.

So are you in any danger at all of these magnet bombs landing on the rim?

I would say that the danger is pretty low. The guides are very good and they tell you when you see an explosion to keep your eye on the magma bombs. And they, um, because the, the volcanic activity is pretty stable and predictable, the guides know where you can go safely and where not to go. They tell people all the time, don’t climb down below the edge of the crater rim. And you do hear stories occasionally about tourists getting killed, but that’s because they break the rules and they go down into the crater and that’s the danger zone. So as long as you listen to your guides and pay attention, it’s perfectly safe. And as I said, they bring up hundreds of tourists there every month. So it’s actually quite safe and really amazing.

And I’m just imagining some drunk frat like, uh, but you won’t go touch the lava betta who will no offense to drunk frat boys. All right. So you get up on the rim. You’re seeing these magma bombs, you’re feeling the shockwaves pass through your body. And somehow you, as a photographer are starting to think about how you can capture this place and capture what it is you’re feeling and seeing in an image that does justice to it in some way. So what was the process for you like in taking these sensory experiences in understanding a little bit more about the story of this volcano and then turning it into a photo?

Well, the first step with this landscape location as with any landscape location, it’s kind of figuring it out. So doing some scouting, exploring on foot where you can to find out what the angles are, to see what you can see basically. And I can extend that by using my drone. And I actually did some drone photography while I was there. This was kind of like in my early days when I first had a drone, so I wasn’t really doing it as much as I do it now. And so I didn’t take that many drone photos. And so the next photo in the sequence is a, uh, another drone shot this time. You know, the first shot was just a reference shot. Uh, and it was, you know, me being involved in the process of exploring the area and trying to figure out what it had to offer.

The second drone shot is, uh, a bit more specific in its artistic goals. And so for the second shot, I, I was flying lower and exploring the lava pools and the scene kind of looked like an evil face to me. So that’s what attracted me to the second composition, because you can see the two little eyes, which are the lava pools and then the steam, or like bushy eyebrows. And then there’s this Ridge with Ash on it. That looks kind of like a, a nose and maybe an evil smile. And so this was really interesting taking this photo because I had to fly the drone low enough to get this perspective. Cause, you know, as I said, this is a really huge crater. And so I was flying the drone down into the crater and I would fly it over the lava pools, but then there would be the inevitable explosion.

And when that happened, I had to zoom my drone up as high as quickly, full throttle going straight up so that I could avoid that magma coming up. And so usually, uh, I was able to avoid the Ash cloud, but sometimes I’d be flying and all of a sudden I’d just see this wall of black coming towards my drone. And those moments were a little scary, but the Ash cloud turned out to be harmless. And luckily I never lost my drone to the magma, but the drone allowed me to kind of scout a little bit more and to understand what the potential compositions would be in addition to what I was doing on land. And then it was a moment of figuring out the best timing to take these shots, the best kind of light. And it’s a bit tricky because the magma is bright now during the day, you can’t really see it that well.

And it doesn’t really show up in the photographs that well, because there’s so much ambient light. So the, I figured out very quickly that the best times to shoot the magma were after the sun had dropped in the evening or before the sun Rose in the morning. So in the Twilight and in the dark. And so when it was very dark out, it was easy to photograph the magma, but it was too dark to pick up any of the surrounding landscape or anything in the sky. So I very quickly realized that the best thing to do was to wait for that moment during the Twilight, when the ambient light levels had dropped enough that they balanced with the native glow of the Magna. So when the exposure for the magma and the Twilight sky were about the same, that was the best time to take a photo because I could capture the magma and it would stand out really nicely and I’d get its color really nice, but I’d also pick up some of the ambient light on the landscape and in the Twilight sky. And there was usually about a five to 10 minute window of opportunity when the Twilight and the magma were balanced and exposure. So I would have a very short window of opportunity in the evening or in the morning to get that balanced exposure, to get the light in the color that I was looking for.

Well, I love that man, because so often as landscape photographers, we show up at a certain time, we evaluate what’s happening in the scene and we take the best shot that we can in that moment. And then we leave, but it takes it that next step, that little bit of vision to realize, you know, what’s going to actually make this shot sing is the balance between the exposure of the magma and the ambient exposure. So when is that going to happen to be able to think that through and problem solve that to end up with a photo that gives you that nice overall exposure while letting the magma really seeing that’s such a great takeaway for any nature photographers to think about, not just what are the conditions right now, but if you were to wait a little while or come back another time, would the light help you tell the story that you want to tell any more effective way?

And the result you can see here? I mean the color contrast you’ve got is absolutely stunning between these arcs of magma and the deep blues of the Twilight there in the background. And I’m looking at a photo right now that has this wonderful billowing steam clouds and smoke, and it looks like there’s cloud in the background as well. And you’ve got these vivid reds and these intense blues and that color contrast really, really makes this photo pop. So can you talk a little bit about how you worked with the coloration of the scene to make such an effective image

As we go through this progression of photos into the third and the fourth photo, you can see that trying to get that complimentary color scheme between the blues of Twilight and that row, that warm color of the magma. And this is just a technique I like to use a lot with my landscape photography is to juxtapose opposite colors. And this is called complimentary colors if a, if you’re in the art world. And so usually what that means is a warm color juxtapose against a cooler color. And what happens is when you juxtapose these opposite colors, they make each seem more vibrant. They pop out a lot more. And I think in digital photography, there’s this temptation to warm up the scene, too much people like those warm colors, those fiery sunrises and sunsets. But if you do that too much, you’re going to lose those cooler tones.

You’re going to lose that complimentary color scheme. And I think as a result, you’re doing your photos a disservice. So preserving that color scheme was part the result of field work. You know, picking that timing. When I had that ambient light balance with the magma, I knew that the two colors would work together really effectively in these final photos. The other part was in the editing process, which was making sure I selected a white balance that wasn’t going to evaporate that complimentary color scheme that was going to preserve those blue colors. And so once I like worked out the timing when I wanted to be there to shoot and the colors that I was looking for, then it was two other things that I had to figure out. So the first was making sure that I had good clouds in the sky. And so there are a lot of examples in these photos where the sky was pretty clear.

So I didn’t really get great clouds, but I think that the photos with clouds are a bit more effective because the clouds bring extra color and shape to the sky. They bring some texture to the sky. And then the final variable was my shutter speed. And I quickly learned that with these, uh, when it got darker and I had these longer exposures that the magmas and it was flying through the sky would create these beautiful streaks of color. And so I quickly settled on doing exposure times between eight seconds and 15 seconds to optimize those glowing arcs of light that were coming out. And so, you know, you can begin to do the math here. I would have five or 10 minutes of optimal lighting conditions every evening. And I’m doing these like these eight to 15 second exposures, and you do a few of those and you’ve run out of that window of time. So that’s part of the reason why I spent so much time at this location a whole week, photographing this place, going up every evening, going up every morning, 14 bites at the Apple was because I needed to figure all this stuff out. You kind of have to go through it first to figure out the optimal light and the compositions. And then once you get those variables, those variables decided what you want to include in your final photos. Then it’s a matter of just patiently waiting until you get them

You want, and it paid off wonderfully here. And I’m looking at this fourth photo in the series here. And to me, this has all those elements you’ve been talking about. It’s got the arcs, it’s got beautiful control over the exposure, not only of the magma, but also the ambient exposure with those deep blues in the background, in those beautiful billowing clouds. Me personally, I would have been stoked to see this pop up with the back of my camera. I probably would have dusted my hands off and said, great, I got the shot. It’s time to move on to something else, but it wouldn’t be an Ian plant photo if you didn’t think about how can I take this to that next level? And if I jump over to the next photo in this series, all of a sudden things change really dramatically. And they go from just a picture of the landscape to a picture of the landscape with a person in it. So what happened there? What was your thought process? Why did you decide to put yourself in the photo and then take us all the way through the rest of the series? How this developed?

Yeah, absolutely. And I mean, you’re right. You always gotta be thinking about how you can take things up to the next level. You can’t just rest on your laurels if you want to make really compelling photographs. And so one of the challenges of this, this massive volcano is that because it’s so big, you’ve got to use a wide angle of view to capture everything. And also because you’re working in times of the day, when a lot of the landscape is pretty dark, you quickly lose this sense of place and the sense of scale. And so my thought was, I need to introduce a human element to make the composition more interesting, and to also create a compelling point of interest for these photographs, because you’re just looking at these photographs and you’re just seeing this lava that’s streaking through the air, and it’s kind of hard to figure out what it is.

And it’s kind of hard to really tell a story effectively. So by inserting a human element to these photos, I figured I could create a, you know, a deeper sense of place and scale, and also create a proxy for the viewer. When you insert a human element into a landscape photo that basically invites the viewer into the scene, they can imagine them being that person and it gives them a vicarious thrill. So I’d worked out these variables. I knew I had to shoot during the Twilight. I knew I wanted clouds. I knew I wanted these eight seconds to 15 second exposures with the streaking magma. And now I wanted a human element and it can be often difficult unless you have a professional model that you’re paying to get someone to work with you. So often when I’m out there in the field, instead of asking these random tourists who are walking by doing their own thing to post for me, I insert myself into the photograph.

And so what I did is I would set up my basic composition. I kind of figure out where the magma activity was the strongest, and I would set up the composition and get all my variable set, shutter speed, ISO aperture, et cetera. And then I would use my remote cable. I would trigger the shutter and then I would lock it. And so what would happen is let’s say I had eight second exposures. The camera was then taking consecutive eight second exposures. And then I would just walk into the scene and figure out the best pose and the posture. And I would stand there for two or three or four minutes just waiting for really good eruptions to happen. And once I had quite a few eruptions, I’d go back, stop the camera from taking exposures, review my shots really quickly make any adjustments as necessary to my settings or my composition or my pose, and then keep going while I still had.

Good. And so the series of images shows you a bunch of different experiments with having a human element in the photograph. So the first photo is me and, you know, I was trying different poses. Some friends of mine jokingly referred to this as the Fonzie pose. I don’t know why, I guess I looked like the Fonz and this a, so the first photo I had some really good clouds in the sky and I had that really nice Twilight glow. So there’s some blues and purples in the sky and the clouds. And then you’ve got the orange and the yellows and the reds down below, which is really nice. The second photo, I didn’t really have many clouds, but I do have a bit of a starry sky in the background. And then in the third photo, I started to experiment with putting a camera in the shot to kind of create this metaconcept and to find a more interesting way of, of bringing the viewer into the photograph.

So this is a secondary camera that I had with me, my backup camera on a secondary backup tripod, and I put it into the shot and I turned on the live view of the camera. And then I started taking photos. And whenever the live view would turn off, I’d go back and turn it on. And that way I could get a photo of the magma erupting and then a view of that in the live view of the camera. So I thought that was kind of an interesting way of portraying the scene. And you can see that I continue to evolve this concept. And so the next photo shows the camera set up with the live view, engaged and interruption in the background, but then I inserted myself into the scene as well. And so I sat down next to my camera. I wanted to create this vicarious experience for the viewer so that they could feel like that was them taking the picture that evening, watching the volcano erupt.

And then finally the final photo in the series, which is the one photo. I think that brings all this together. This is the closest thing to the perfect execution of all these concepts into one photo. This is actually not me. This is another photographer that was there, uh, who was standing on the crater rim, photographing the eruption. So I stepped back as far as I could and made this photograph, incorporating him in the scene. And I got a really nice eruption behind him, but what makes this shot work in my opinion is the really dynamic clouds in the sky. So they’ve got this really great shape and they fill that space in the sky. So I’m able to bring together that Twilight glow, the complimentary color scheme of the blues of the sky and the warm colors of the magma, the human element, and some interesting cloud shapes. So this is the closest I was able to get to achieving that vision that was in my head.

Well, that’s a really fantastic evolution. And what I enjoyed about that story just now is that it shows that it’s not just about rocking up to the location, slapping camera on the tripod, hitting that shutter button. And you’re good to go, you know, to really create any vocative iconic photograph. It’s about having an idea. First of all, then spending the time to get to know the place, then developing that idea and seeing where it takes you. But there are so many other elements that you can’t control, right? Like mother nature. And so even if you could position this photographer in this exact spot and have your exposure dialed, you’re also dependent on the clouds. You’re also dependent on where the magma bursts happen and do they create the right silhouette or are they in the wrong spot? So this is such, just a beautiful epitome of what it’s like to be a nature photographer, where you bring your a game and mother nature brings her a game and it all kind of comes together in this half controlled half chaotic dance, this beautiful expression of the world that we live in. And I’ve got two questions for you. Now, one is, um, you said that this was the closest that you got to capturing the vision that you had in your head. Is there something that you would do differently if you could go back another time?

Yeah, absolutely. And you know, one other part of this process, this dance that you’re talking about is, is your own creative exploration and evolution. And so what often happens is when you’re out making photos in the field, you take a moment to step back when you’re done and really look critically at what you’ve done. And sometimes you are able to say, you know, I got it this time, everything worked out great. I wouldn’t change a thing. Other times you realize that there might’ve been a better way of doing things. And so one of the challenges I had when I was making these photographs is that the crater rim was very narrow at the top. And as a result, I was never able to really back away from someone I was photographing, whether it was myself or someone else. And so, as a result, the people in these photographs are fairly big relative to the overall scene.

And so the background landscape, this massive volcano, even these massive eruptions end up looking a little small relative to the silhouette of the person in the foreground. And so I would like to reverse that now I wasn’t able to get farther away from these people to make them shrink in the landscape, uh, because of the crater rim sloped so much. If you started moving backwards, you started going down and you lost the angle on the person and you couldn’t see the eruption behind them anymore, the volcano behind them. So I think the answer to this is if I do return is to try to use my drone, to do the same thing and the drone can fly farther back and, uh, it can also fly higher up. So I can keep that perspective where I’ve got that big, massive explosion in the background, but I can shrink the person in the foreground so that I can have the landscape scene look bigger than the person. So I think that would be a, a better way of showing the sense of scale and creating a dramatic image. And actually I was supposed to be back at this location this past may, but the pandemic completely screwed up my travel plans. So I’m going to probably have to wait maybe another year until I can go back and try this new concept and see if I can’t bring these images up to a higher level.

Cool. That sounds totally Epic. And I hope that we can get traveling again, because I want to see you get back there and take that photo, because I’m trying to imagine how that anything could be cooler than this, but if you think it could be next level than I really want to see it. And that leads into my last question that I’ve got for you right now, Ian, which is you spent a lot of time at this volcano, right? You, you were there for a week. You went up at sunrise and sunset every day. Why spend that much time? And you’re talking now about going back another time, you know, a lot of photographers would say, okay, I’ve got a week in Vanuatu. This is awesome. I’m going to hit 14 different locations at sunrise and sunset. You said, I’m going to hit the same location, every single sunrise and sunset. What’s your thought process? Why do you approach photography in that kind of way to go deep instead of broad?

Speaker 1: (27:59)
Well, I think first of all, that, you know, a lot of people are of the mindset that they want to see as much as they can photograph as much as they can and whatever time they have, and there’s nothing wrong with that. But I think that the end result is more likely to be maybe a bunch of good photos, but not that many great photos. If you want to make really great photos, you really got to put in some time and effort. Like sometimes you can just show up and get lucky, but usually you’ve got to scout the location, figure out what the best compositions are, figuring out the best light. And you can’t just, I mean, you can do some research ahead of time, but you really can’t understand how the light is going to work with a particular landscape until you’ve sat through it.

And you’ve seen exactly how it will play upon the landforms. And so you’ve got to put in some time there, but, you know, as we said earlier, you know, during this dance with mother nature, she’s not always bringing her best. And so sometimes you’ve got to wait it out. And I think it’s important to have a vision in your head and try to impose that vision on the real world. And the only way you can really do that is through patients because you have to wait for the real world to spontaneously align and converge in a way that is close to what your creative vision is. Hopefully you’ll get it to align in a way exactly the way it’s in your brain, but more often than not, you’ll just get as close as you possibly can to something that you’ve thought of. And I think the other thing to keep in mind here is that you’re probably going to make your best photographs when you are photographing something that inspires you.

And this was a place that really inspired. I mean, it really spoke to me in a dramatic and compelling way. And so if you’ve got a place that you really love, if you’ve kind of figured it out, but you didn’t get exactly what you wanted, then the best thing you can do is find a way to get back to that spot and keep working it until you get what you want. Because I don’t know. I think back at the parts of my evolution as a photographer that I regret the most and I, I don’t regret getting to a spot and taking photos, even if it’s a spot I’ve been to many, many times before, what I regret are the shots that get away from me the, the, the times where I was somewhere. And for some reason, I wasn’t able to execute at the highest level. That’s what you regret. And that’s what I try to avoid doing. I mean, I, I just shoot what inspires me and I just try to get the best shots that I can from those places that inspire me. And if I don’t get my very best, then I find a way to get back there and make it happen.

Well, you inspire me, man. I think that’s a great takeaway for everybody out there. Listening is the more meaningful photography that you want to do. It’s worth that time to execute on your vision, to make it happen, to follow the stories that inspire you as deeply as you can, to really get to know those subjects. The last thing the world needs is a thousand photographers skipping across the surface, creating cotton candy, pretty pictures. We need more meaningful imagery that tells these stories of what a marvelous, extraordinary place the planet really is. Right? So thank you so much, Ian. I really appreciate being able to spend this time with you to learn about a place that I didn’t even know existed, first of all, and to see these wonderful images and to know that you’re going to go back and shoot some more cool stuff that maybe we can have a chance to talk about again, in the future for everybody out there, who’s not already following Ian, please do yourself a favor. I’m going to link all of his stuff down below in the video description, go follow him. You’re going to be blown away by the quality of the photography and the commitment to creating these images. It’s really, really inspiring. It’s always great to talk to you, man. Thank you so much for being here on the program. It’s been an honor to talk to you.

Thank you, Josh. The honor is all mine.

All right, everybody. That’s going to do it for this episode of how I got the shot. So until next time have fun and happy shooting.

Share This Article:

Facebook
Twitter

Composition: A simple, story-based approach to effective landscape photos.

Composition: A simple, story-based approach to effective landscape photos.

Here’s a question for you. How do you tell truly captivating stories with your landscape photography stories that tell your viewers what you want them to know about a place I’d like you to ponder that for a minute? Because it seems to me that when you scroll through social media, these days, the only acceptable way to create a landscape photograph is to get as close as possible to your foreground subject, to have it dominate the entire frame. While I love a composition like this, when it’s appropriate shooting like this purely for visual impact is more like landscape photography porn in that it emphasizes aesthetics and visual impact over everything else, as opposed to being actual effective visual storytelling. In my opinion, the process should go the other way around first, start with the story that you want to tell, and then let that dictate your composition. And in this video, I’m going to show you exactly how to do that.Greetings my excellent friends. It’s Josh Cripps here. And as you know, I love the concept of storytelling in photography. And one of the things that I find truly extraordinary is that you can take the exact same physical stuff within a scene. And by changing your composition completely change the story that you were telling. Let me give you an example

You’ve ever been to Mount cook national park in New Zealand. It’s very likely that you have hiked the Valley track nurse. One particular spot on this track where you go over a swing bridge. And as you round the bend, you are smacked in the eyeballs with one of the most marvelous views of our [inaudible] Mount cook. This particular band. It’s one of my favorite places in the park for photography. And this particular setting I would say is dominated by five or six main features. There’s obviously [inaudible] Mount cook, but then there’s also this steely blue river. And within that, there are heaps of these cool chocky boulders. And there’s quite a lot of other stuff you can look at in this scene as well, like Mount Wakefield to the East and Mount Sefton out to the West as well of some beautiful little shrubberies. But for this video, I just want to focus on those three things out AKI Mount cook, the river and the Boulder Photography. Aesthetics would dictate that the correct composition for this scene would be to get as close as possible to a Boulder or a cascade in the river and make that foreground element as in face as possible. Now that’s fine. If the story that you want to tell your viewer, now that’s fine. 

Now. That’s fine. If the story you want to tell your viewer is more about your experience with the boulders and the river, more so than your experience with the mountain. And what I mean by that is, well, let me tell you a story. As I rounded the bend, the pathway came right down next to the river. I was mesmerized by the color of the water, the roaring cacophony of the cascades and the wonderful patterns and shapes in the boulders. And then often the background, you could also see our Rocky Mount cook. You see how this photo tells that kind of a story, but what if the story that you wanted to tell was more like I was walking down the trail, I came around a bend and that’s when I saw it out. Rocky Mount cook. It was so enormous and powerful, and I could not believe the way that it loomed over the entire Valley. I mean, you’re looking at 10,000 feet of mountain rising, straight up out of the landscape. And on top of that astounding physical presence, the light from the peak even reflected and started dancing over the river and the boulders at my feet. You see how these two stories, even though they contain the exact same physical stuff, mountain river boulders, they emphasize two completely different things.

If you want to be an effective storyteller as a photographer will, then you need your compositions to match your impressions of the location. Your composition needs to show how you were feeling about the place and what was most important to your experience in that second story that I told you would be much better served by creating a composition like this one, where you stand back a little bit from the river’s edge and you zoom in a little bit more. In fact, this photo was taken with a 50 millimeter lens and you can see how it emphasizes the size of our Rocky Mount cook so much more dramatically than the boulders and the river. If I go back to a photo like this, what I’m telling the viewer is that the most important part of this scene was the river and the rocks. That’s what left the biggest impression on me as a photographer.

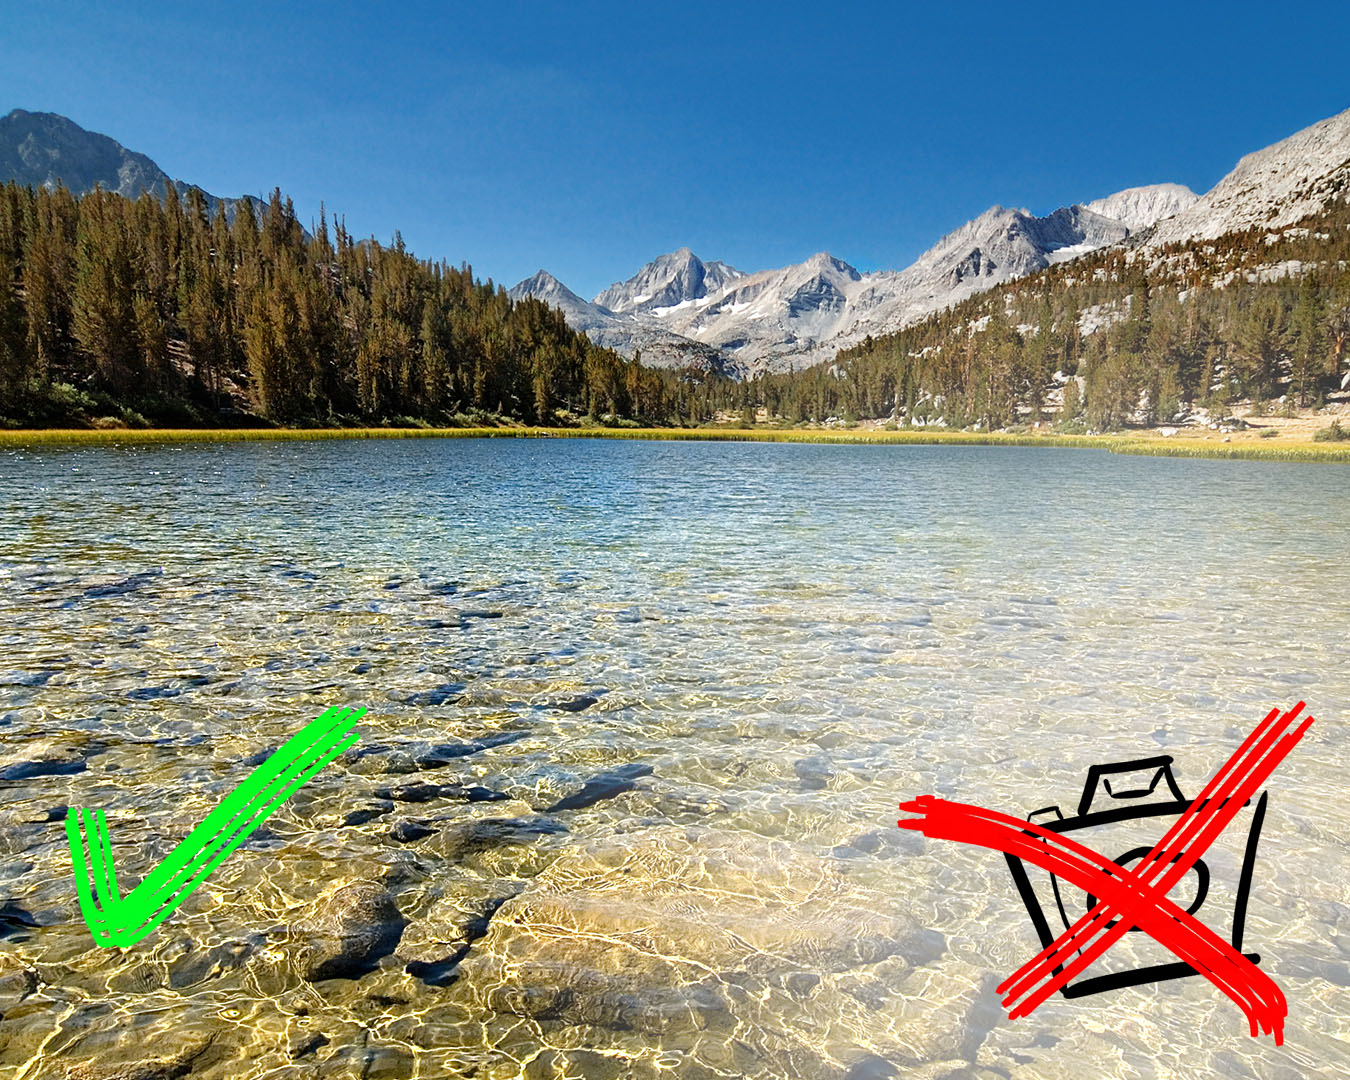
So I’m giving it the dominant amount of space in my photo, because that’s what I want you the viewer to take away from this scene. But of course, it’s not just about changing your focal length or zooming in to change the composition. So let me give you another example of how you can change your composition to tell a different story with the same elements. Here are two photos from Kings. They have the exact same elements in them. There’s a tar and there’s mountains, a sky or reflection. And those rocks under the water here in the foreground, and these photos were taken with the exact same camera, same setting, same focal length, same everything, just a different composition. This vertical composition puts so much more emphasis on the clarity of the water. And consequently, it sends a message of the pristine nature of this basin and gives you a sense of what it’s like to stand there, to dip your toes in this water.

But to be honest, that wasn’t exactly the story that I wanted to tell in that moment. For me personally, I was more struck by the infinity pool effect of this Tarn. And I really wanted to tell a story of the expansiveness of this place, how the sky in this basin seems to go on for forever, this vertical composition while it is engaging. It doesn’t tell that story does it. In fact, this composition feels a little bit tight and closed off, but a horizontal composition like this does paint that picture of endless space, right? You can see how the sky in this photo is so much more expansive and not just in the sky itself, but also in the reflection I’m actually giving you twice as much sky, which helps sell this idea of this place going on forever. Now, obviously you don’t have to choose one over the other.

You can think about both stories and take both photos. And that’s fine. I mean, clearly I shot both, but it is important that you actually think about these things in the field so that your compositions capture the stories that you actually want to tell your viewers. So to sum it all up, if you want to be your own artist, don’t be a slave to the popular aesthetic. First think consciously about the story that you want to tell and what you want your viewers to know about a place. Then use your composition to line up the elements in the scene in a way that tells that story. And if you do this, I guarantee that your photographs are going to be more successful and more personally expressive, which is what it takes to create art that you are proud of. Thank you so very much for watching. If you enjoyed this video, please like, and subscribe and share with your friends and your camera club, I will catch you guys soon in another video. So until next time have fun and happy shooting.

Share This Article:

Facebook
Twitter

Life Lessons Learned Through Photography: Go Big Or Go Home

Life Lesson 7: Go Big Or Go Home

This is the last in a series of 7 videos discussing important life lessons that photography has taught me. And this one is arguably the most important.

Ok, I know that is one egregiously cheesy title: Go Big or Go Home? It sounds like something a drunk frat boy would shout before downing another shot of Jaegermeister and jumping off the roof into the pool. But if we look a little closer we’ll find that there is substantial meaning there.

For me that phrase means to do something all the way or not at all. Whatever you’re doing, do it as well and completely as you can. In short: do it right. If it’s something that represents you personally or professionally, don’t half-ass it, and don’t quit if you know it can be done better.

Another way to look at it is this: is it Good Enough, or is it actually Good? After all, there is a huge difference between the two. I can’t tell you how many prints and mats I’ve had to scrap because they had some tiny flaw; something I know my customers would never notice. But I knew it was there and simply couldn’t sell something to a customer that wasn’t perfect. It might have been Good Enough, but it wasn’t Good.

But why not settle for Good Enough? The reason is when you care about something enough to do it right, to try as hard as you possibly can to make it not just Good Enough, but well and truly Good, that’s when you start to push your own limits, to produce remarkable things, and to make people stand up and take notice.

Let me give you an example: the first time I visited New Zealand exclusively for photography was in 2007, and I was still learning the ropes of the craft. I also had a Good Enough attitude. I had visions for shots that I wanted, but that might be difficult or uncomfortable or expensive to achieve.

“Eh,” I told myself, “when I’m a professional then I’ll get that shot. When I’m a professional I’ll stand in that freezing cold stream to get that composition I really want. When I’m a professional I’ll start hiking at 3 am to get to that lake by sunrise. When I’m a professional I’ll pay for that helicopter ride to the top of the glacier. For now I’ll just settle for where I’m standing. It’s good enough”

It took a few years but I ultimately realized that I had that sentiment completely backwards. It’s not as if someone bestows upon you the title of “Professional Photographer” and you are all of a sudden then endowed with magical abilities to scale mountains, stand in icy streams, and afford helicopter rides.

Rather it’s the opposite: it’s your commitment to your craft that makes you a professional. It’s your dedication to an image that makes you wade into that frozen river. It’s your drive to get up early and hike long miles to capture an amazing vista. It’s your willingess to go the extra mile to fly to the top of the glacier that results in unique images. It’s all about doing it right. Being Good, not just Good Enough.

So when I returned to New Zealand in 2012 for a month-long photo adventure it was with this mindset: whatever it took to get the image I wanted, that’s what I was going to do. I wanted to photograph the Southern Alps from the air, so I spent the money on a scenic flight.

My result was this intimate landscape shot of the Godley River and Lake Tekapo; it’s now one of the most unique photos in my portfolio.

Godley View photography life lessons

I wanted to photograph a glacier, not just from its face, but from within the glacier itself.

ice arch photography life lessons

So I took a heli-hiking tour on the Fox Glacier, and was able to capture this photo from within the heart of the ice itself.

Light Within photography life lessons

I envisioned a shot of the icebergs in Hooker Lake, so I purchased a pair of hip waders and spent two nights in a row freezing my legs solid in the lake, and hiking the miles there and back in the dark in order to give myself the opportunity

And I came away with this photo, which is now one of my personal favorites.

hooker lake photography life lessons

Needless to say, these are photos that wouldn’t exist if I hadn’t done what it took to follow my vision to its completion.

And I’m not trying to make myself sound like the baddest dude who ever lived (cuz I’m pretty far down that list), but rather just to illustrate the mindset I now have when approaching my photography, as well as the other things I care about: figure out what it takes to do it right and do it. Don’t half-ass your life because you’ll only end up with regrets, and in the end you won’t have a chance to do it over.

As always, thanks for watching! You can see more in this series here:

Got another question? Check out our Landscape Photography FAQ here:
https://www.joshuacripps.com/landscape-photography-faq/

Be sure to subscribe to our newsletter and YouTube channel for even more landscape photography how-to.

Join Josh on Social!
http://instagram.com/joshuacrippsphotography
https://www.facebook.com/JoshuaCrippsPhotography

Life Lessons Learned Through Photography: Plenty Of Fish In The Sea

Life Lesson 6: There Are Plenty Of Fish In The Sea

Do you find your blood pressure rising when you miss out on a great photo? If so, then you need to learn Zen and the Art of Landscape Photography, because there’s always another great shot waiting for you in the future.

Any landscape photographer will tell you how much it hurts to miss a shot. Maybe you got stuck in traffic and the sun set without you. Maybe you risked going to one spot and the light blew up somewhere else. When these things happen it’s like someone slowly and painfully sucking the life force out of you.

At least that’s how I used to feel. Until I learned the only real answer to losing out on an opportunity is to take a deep breath, enjoy the experience as best you can, and then move on. Because you know what I realized? If you go out looking you will ALWAYS find another sunset.

Let me tell you a story about my friend. He got married a few years ago, then went on his honeymoon in Europe and had the time of his life. When he got back to California I asked him about the trip. He told me about all the great things they saw and did, the amazing food they ate, and the lively people they met.

He also mentioned how one night, when they were just chilling in their room overlooking the Mediterranean, he and his wife saw the most beautiful sunset they’d ever seen. Me, being a photographer and somewhat of a sunset connoisseur, got pretty excited about that and told him I couldn’t wait to see the pics.

When the photos finally showed up online I hungrily dove in to them, searching for that epic sunset. Then I saw the pictures of it and well, I was a little disappointed. Not because it wasn’t a beautiful sunset; it absolutely was. But was it one of the most beautiful I’d ever seen in my life? Not by a mile.

And that’s when it hit me: I had no right to ever complain about missing out on shooting a sunset, because I’d already seen so many incredible light shows that my cup was overflowing with beauty. I mean, if I had missed a crazy sunset over Santa Cruz, I couldn’t really be upset, because I’d been fortunate enough to have already seen others. And if I had missed those I couldn’t be upset because I’d seen other amazing ones in Death Valley. And I’d seen this one in Santa Cruz:

santa cruz sunset life lessons

and this one in South Africa

south africa sunset photography life lessons

and this one in New Zealand,

New Zealand Sunset - Photography Life Lessons

and this one in Santa Cruz,

Santa Cruz Sunset photography life lessons and this one in the high Sierra,

sierra sunset photography life lessons

and,

tgif sunset Photography Life Lessons

on and on and on and on.

I realized had a pretty good track record when it came to beautiful sunsets. And suddenly I had an epiphany: if this was the trend in my past, wouldn’t it likely be the trend in my future as well? In other words: if I kept looking for amazing sunsets, I was going to keep finding amazing sunsets. And that instead of being disappointed by the ones I’d missed, I could choose instead to be excited about the ones I’d see in the future. It was at that point that a great calm descended over me, because I knew I never again had to be upset about missing good light.

Of course this was all a metaphor for life in general, which meant that I had no right to be upset about missing any opportunity because there would always be another one down the road. I realized that opportunity only knocks once if you give up. But it knocks time and time again if you’re always there to open the door. And that you will find what you’re looking for, no matter what it is, but the key is you have to keep looking.

As always, thanks for watching! You can see more in this series here:

Lesson 7: Go Big or Go Home

Got another question? Check out our Landscape Photography FAQ here:
https://www.joshuacripps.com/landscape-photography-faq/

Be sure to subscribe to our newsletter and YouTube channel for even more landscape photography how-to.

Join Josh on Social!
http://instagram.com/joshuacrippsphotography
https://www.facebook.com/JoshuaCrippsPhotography

Life Lessons Learned Through Photography: No Pain No Gain

Lesson 5: No Pain No Gain

Good morrow and welcome to PPT; I’m sharing 7 of the best life lessons I’ve learned by being a photographer. One of those is, sometimes in order to learn, your lessons really have to hurt.

I’m lucky in that I’m a good student. Sit me down with a textbook or a teacher and I can learn just about anything. But the problem I’ve found with that kind of academic learning is that it’s temporary. The knowledge comes into my brain, bounces around for awhile, and then six months later it flutters out of my ear or nose or something. Not really sure how it gets out, but I do know that it’s gone.

But you know what kind of knowledge does stick around? The kind that was painfully gained. If some lesson hurt you to learn it, then I guarantee you are going to hold that lesson dear for a long time to come. Let me give you an example:

When I was living in LA and just starting out with photography I spent a lot of time exploring the southern part of the Palos Verdes coast around Abalone Cove. In spring of 2008 I went out a couple of nights in a row: the first night I decided to experiment with night photography, so I cranked the ISO on my trusty old Nikon D50 to a whopping 1600 and took some really awful photos.

The next night I was in more of a seascape mood so I hit the beach, found this rock, and created a seascape composition. Being fairly inexperienced with photography and seascapes I was pretty happy with what I thought was a novel composition, some interesting motion in the water, and decent light and drama in the sky. In other words, I had a keeper! And I couldn’t wait to process this shot into a little bit o’ magic once I got home.

But once I actually pulled the image up on my computer I discovered to my horror that I had left my ISO at 1600 from the previous night. And on the D50, ISO1600 was pretty much the equivalent of pouring sand on your sensor. Upon a close-up of the image; you can see how much of the detail is obscured by noise and crap! My amazing shot…ruined!!! Well you can bet that since night I’ve double and triple checked my ISO before every shoot.

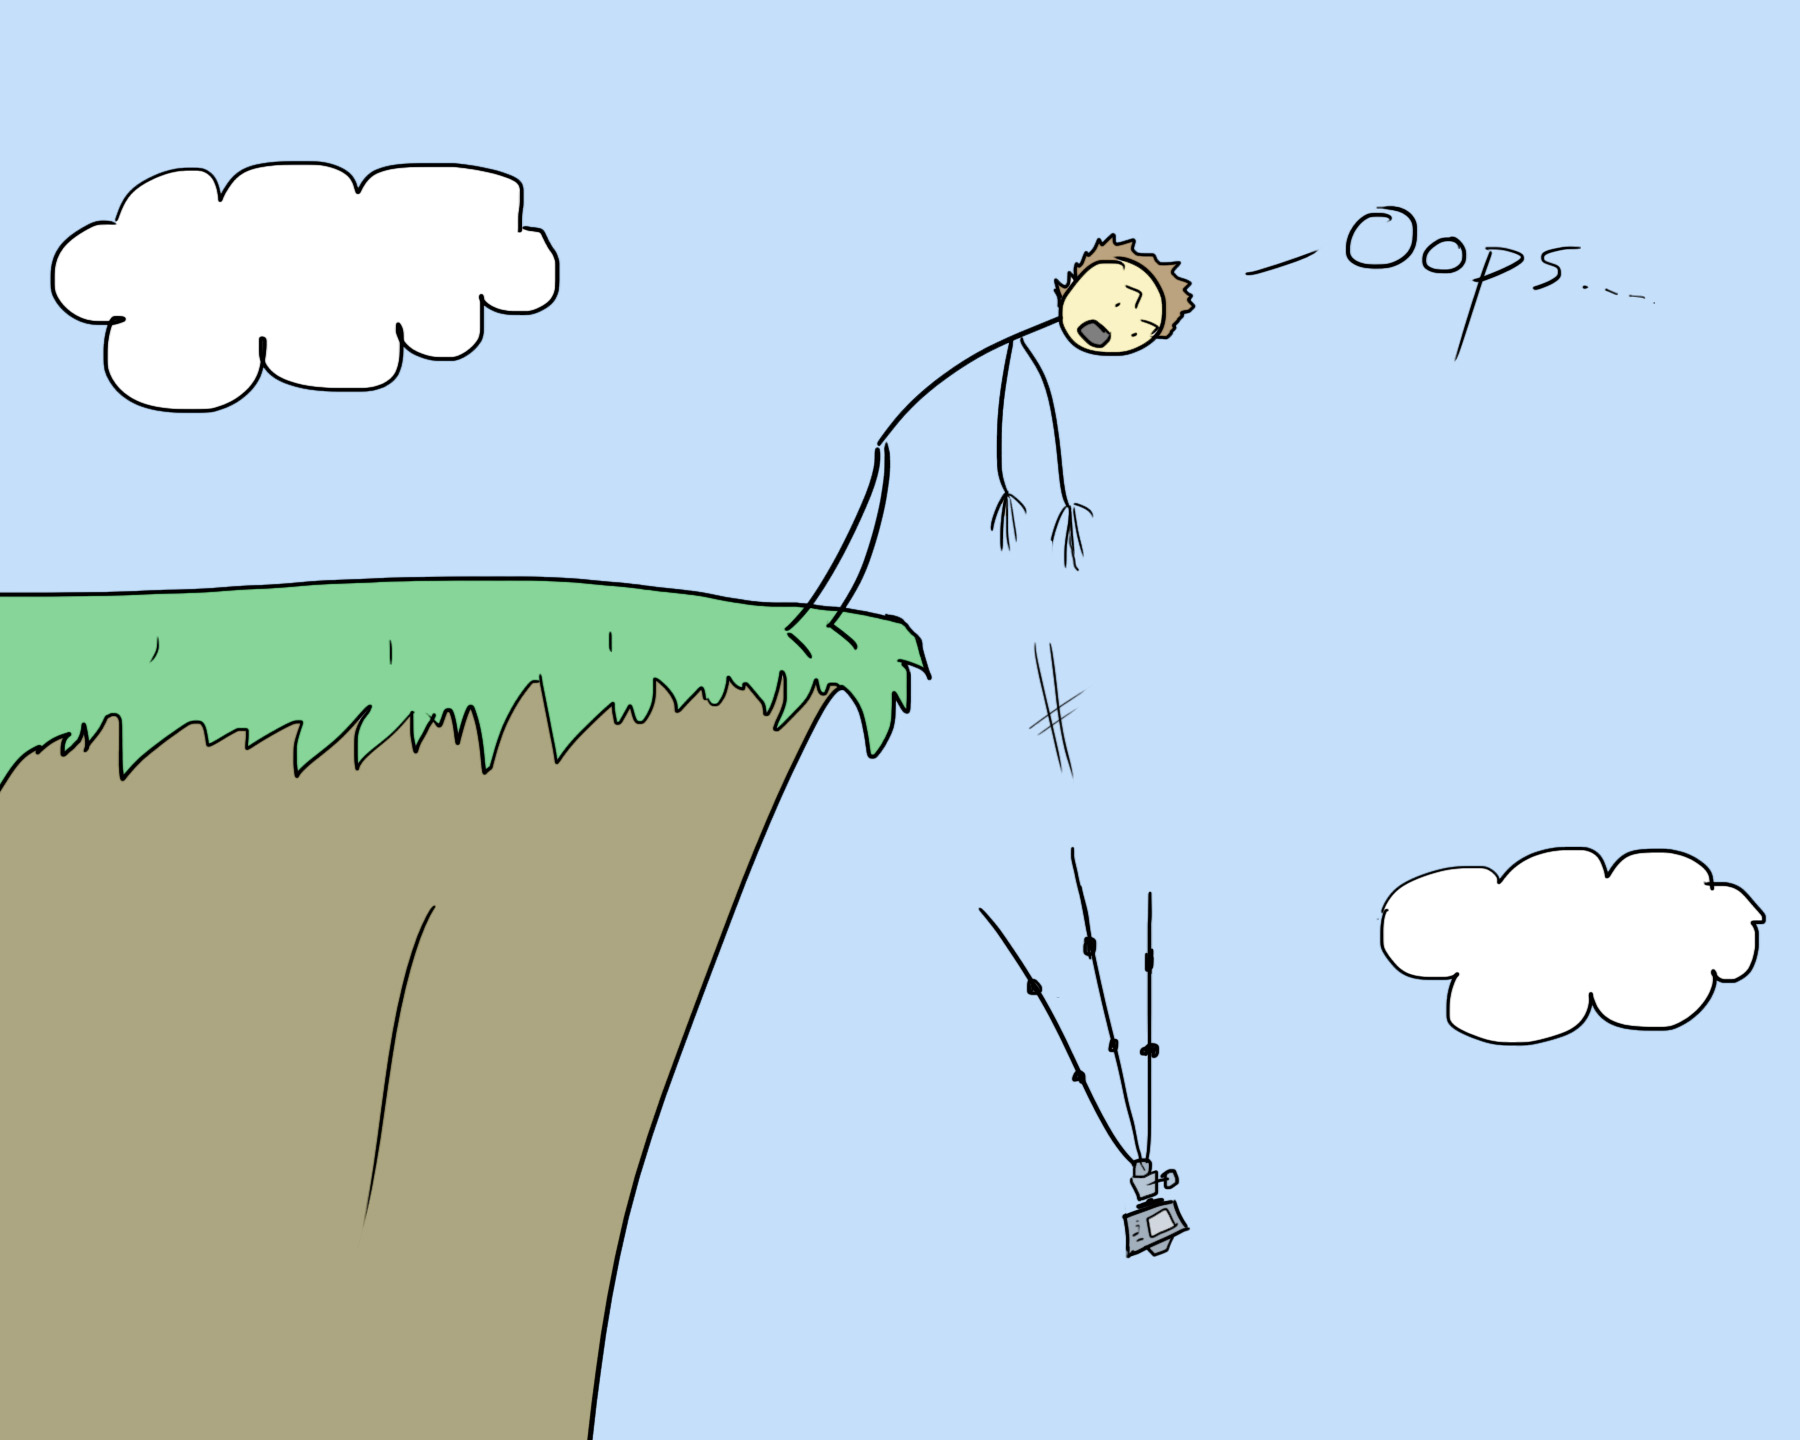
Another, more tragic example. My camera falling lens-first onto a rock. A first-person glimpse into a $750, blink-of-an-eye equipment loss. But you know what? That $750 lesson has stuck with me and now I always make sure my tripod is level and secure before I take my hands off of it.

These kind of mistakes suck. They hurt, they’re expensive, they wound your pride. But the moral of the story here is to not be afraid to make them, or to fail spectacularly. Because those failures and mistakes will teach you stronger and more enduring lessons than a constant string of successes will.

As always, thanks for watching! You can see more in this series here:
Lesson 1: Image Is Everything
Lesson 2: Just Do It!
Lesson 3: Never Give Up
Lesson 4: No Risk No Reward
Lesson 6: Plenty of Fish in the Sea
Lesson 7: Go Big or Go Home

Got another question? Check out our Landscape Photography FAQ here:
https://www.joshuacripps.com/landscape-photography-faq/

Be sure to subscribe to our newsletter and YouTube channel for even more landscape photography how-to.

Join Josh on Social!
http://instagram.com/joshuacrippsphotography
https://www.facebook.com/JoshuaCrippsPhotography

Life Lessons Learned Through Photography: No Risk, No Reward

Lesson 4: No Risk, No Reward

Alright, let’s see here. I’m in a location I’ve photographed a dozen times before, and I’ve got the same composition I’ve shot a dozen times before, and I’m here at the prescribed time for good light, now I just have to sit back and take my nice, boring shot. This is a series of my 7 favorite life lessons I’ve learned by being a photographer. Now I want to talk about how Business as Usual is Boring.

I am anti-icon. The Tunnel Views, the Golden Gate Bridges, the Torres del Paines, the Antelope Canyons. Each of these places is so spectacular and famous within the photography community that they have become cliches. They are beautiful but boring, and you can find better things to take pictures of.

Now, I’m not saying you shouldn’t ever shoot these places. In fact, there are great reasons to shoot the icons. If you’re just starting out they can be a great place to test and improve your photography skills. By shooting an icon you have taken one big variable out of the equation: the location. You know it’s going to be jaw-dropping.

And heck, these places have become icons for a reason: they’re insanely beautiful. It’s hard to go to places of such grandeur and to not need to take a photo. So yeah, there are some great reasons to shoot the icons.

But for purely personal and artistic reasons, ditch ’em! Leave the parking lots, pull-outs, and crowds behind. Get off the beaten path and go exploring. The uncertainty can be daunting when you don’t know what you’re going to find, or if you’re potentially going to miss out on a great shot somewhere else because you accidentally ended up splashing through a ravine instead of shooting at Glacier Point.

And face it, a lot of times that’s exactly what happens: you try to discover some new vantage point at Horseshoe Bend and get totally skunked, while your friends at the classic view are happily capturing some breathtaking sunset.

Yeah it sucks, but the flip side is so incredibly rewarding that in my opinion you can’t afford to not take the risk. Look at Galen Rowell, a giant of a photographer, and my #1 influence. That guy practically lived off the beaten path, and by doing so he popularized so many of the icons we shoot today: Horsetail Falls, Mobius Arch, Cuernos del Paine, and more.

As a more personal example, take a visit to Yosemite I made a few years back. That day the sky was full of dramatic clouds and as always when that’s the case, the temptation was to go to a safe spot, like Valley View or Tunnel View. But instead I decided to take a chance and see if I could find something unusual

As I hiked up the endless, steep switchbacks along the Upper Yosemite Falls trail the storm clouds began to break up, and warm light was streaking through the Valley. By the time I got to Columbia Rock the texture and light saturating Yosemite were spectacular, and I was able to take a great photo of Columbia Rock. But as happy as I was to see that image pop up on the back of my camera it wasn’t quite what I’d hoped to find. So I continued up the path and came to a spot where it was possible to scramble up the cliffs along the north side of the trail.

That put me in an unusual vantage point and I was able to come home with an incredibly unique  shot of Yosemite Valley which has since become one of my best-selling and best-known photos.

So what’s the lesson here with this No Risk No Reward mantra? Simple: get out of your comfort zone! I’m not saying you have to scale cliffs or do something dangerous or unsafe. Just push your boundaries a little bit. Don’t be afraid to fail or make mistakes or miss out on opportunities by trying something unknown.

You may fail more than you succeed but when you do succeed it will be surprising and novel and amazing. And personally, I think that new experiences are the foundation to having an interesting life. So try something new, try something unknown, and make your time on this planet as interesting and rewarding as possible. And for you photographers: this is a guaranteed recipe to create images that are yours and yours alone. And who among us doesn’t want that?

As always, thanks for watching! You can see more in this series here:

Got another question? Check out our Landscape Photography FAQ here:
https://www.joshuacripps.com/landscape-photography-faq/

Be sure to subscribe to our newsletter and YouTube channel for even more landscape photography how-to.

Join Josh on Social!
http://instagram.com/joshuacrippsphotography
https://www.facebook.com/JoshuaCrippsPhotography

Life Lessons Learned Through Photography: Never Give Up

Lesson 3: Never Give Up

Sometimes the key to success is knowing when to give up, and when is that?…….Never! This is a series of my 7 favorite life lessons I’ve learned by being a photographer. In this video I want to talk about the power of perseverance.

Some things in life you can control, like whether you buy white or wheat bread. But many things you can’t. In nature photography it is much the same.

In fact, out here you’re lucky if you control 50% of the process. You and your camera show up but nature has to meet you halfway. Your camera technique can be impeccable, and your composition masterful, but if the light doesn’t cooperate then you get bupkis. Or conversely, if the light is killer but you screw up somehow, like maybe you accidentally left your camera at ISO 204,800 from when you were trying to shoot those nocturnal hummingbirds. Either way, you go home with nadda.

So what can you do? Only one thing, and that is just give up. Not! Just wanted to see who was paying attention. All you can do is keep trying. Over and over and over.

In early 2010 I was spending a lot of my afternoons scouting the Santa Cruz coast for new locations to shoot. On March 13th I came across a neat shelf which showcased cool features like a gaping sea cave, vivid green algae, and this rocky pinnacle. Even cooler, as the waves crashed against the shelf they would wrap around this pinnacle and form a 15-foot waterfall down the back side.

This had the makings of an awesome photo, but everything had to be just right: nice light behind the pinnacle, and a tide and swell high enough to send water around the rock to make a great waterfall, but not so high as to wash me away into the ocean. So I estimated when the right tide would be and started making trips.

On March 14th I came out at sunset and had some ok light, but it was all to the west. Boo.

Ten days later the tide was right again. So on March 24th I visited the shelf and got the exact waterfall action I was looking for but the heavy clouds kept any color from creeping into the sunset. Boo.

On March 30th conditions were looking promising so I again took a trip. and Again I had some decent light but it was all to the west, with nothing of interest happening over my little rocky point. Boo.

Now I was 0 for 4 attempts on shooting this wavy waterfall. But did I give up? Heck no! I just kept trying and on April 9th the tide and clouds were looking good. So out I went yet again and this time everything fell into place: the clouds to the southeast lit up with color, and the waves sent gorgeous cascades of whitewater around the rocky pinnacle to give me my waterfall. And all that effort and repeated attempts made the final image even sweeter to me.

The moral of the story here is pretty clear: when you want something, go after it. Over and over and over. Never give up!!!

As always, thanks for watching! You can see more in this series here:

Got another question? Check out our Landscape Photography FAQ here:
https://www.joshuacripps.com/landscape-photography-faq/

Be sure to subscribe to our newsletter and YouTube channel for even more landscape photography how-to.

Join Josh on Social!
http://instagram.com/joshuacrippsphotography
https://www.facebook.com/JoshuaCrippsPhotography

Life Lessons Learned Through Photography: Just Do It

Greetings home slices, In this series of videos I’m sharing 7 of the best life lessons I’ve learned by being a photographer, and right now I want to talk about those little nagging doubts we all get when trying to decide whether to go for something or not.

Lesson 2: Just Do It!

Hmmm, could be a good sunset tonight? But then again, maybe not. So hard to tell tell…is it worth going out to shoot??

Here’s an easy way to tell if something is worth doing: JUST DO IT.
A lot of photographers, myself included, spend as much time talking themselves out of shooting as they do into shooting. I get it: your time is valuable and you don’t want to waste it on a wild goose chase, or a wild light chase as the case may be. So you start to ask yourself questions like “How are those clouds looking?” “What’s the forecast say?” “Is the storm going to break in time?” “Where’s the best place to be?”

Ostensibly questions like that aim to help you make an informed decision about whether or not to go shoot. But the hidden purpose of these questions is to cast doubt on the idea of shooting in the first place. After all once you start to ask yourself a dozen questions about whether something is worth doing, more often than not you say to yourself, “meh, I’ll just not do it.” But in my experience it is damn near impossible to actually predict what’s going to happen, with light in the sky or with any other new experience. So you should just go out and shoot. Just do it.

Let me give you a case in point. When I first moved to Santa Cruz in 2009 I lived in an apartment with an ocean view. Very handy for checking out the conditions on the coast. One day it had been raining incessantly all morning but when I heard the rain stop in the afternoon I went out to check the view.

It was still completely overcast, but with the tiniest, faintest, merest strip of slightly brighter overcast just above the horizon. I literally had a 20 minute debate with myself over whether I should go out or not. In the end I decided to go, and this is what the conditions were like when I got to the beach:

I can hear you all cheering with excitement. Yeah, it was pretty gray and the part of me that wanted to stay home was doing a little victory dance in my head, “see, I told you it would suck.” Still, I had come all the way out to the beach, I figured I ought to look around.

I headed down to the south end of the beach and found some neat mudstone rocks I’d never seen before. As sunset approached the sun slipped into some unseen break in the clouds, and the light began to do this:


As the sun continued to drop below the horizon the clouds lit up with a combination of magenta and pink I’ve yet to see repeated. Suffice it to say that I stood on, watching this, with my mouth agape like some slack-jawed yokel. At least I had the presence of mind to hit the shutter button a couple of times, and came home a better image.
The moral of the story here is clear: in photography and in life, it’s easy to second guess yourself, to ask doubting questions, and to talk yourself out of doing things. But you never know what the experience is actually going to be like until you try it. So just do it. Because you never know until you go.

Got another question? Check out our Landscape Photography FAQ here:
https://www.joshuacripps.com/landscape-photography-faq/

Be sure to subscribe to our newsletter and YouTube channel for even more landscape photography how-to.

Join Josh on Social!
http://instagram.com/joshuacrippsphotography
https://www.facebook.com/JoshuaCrippsPhotography

Life Lessons Learned Through Photography: Image is Everything

Photography has taught me valuable lessons that have improved my life immeasurably. In this series discover 7 of the best life lessons learned through photography.

Lesson 1: Image is Everything!

For those of you who haven’t heard of Peter Lik, he’s probably the most commercially successful landscape photographer of all time. A few years back he traveled to New England for the fall color change, took a single frame of some pretty trees reflected in a pond, made a single print of that shot, and sold that print for a million dollars. Yup, a million. He has galleries in major destination cities like Honolulu, Aspen, Vegas, and Miami, and each is immaculately presented: the photos are huge and beautifully lit, with ridiculous wow factor. The galleries reek of upscale chic and you can expect to shell out at least a couple grand if you want to hang his work on your wall. Personally I’m not a huge of fan of Lik’s. He’s a decent photographer but often I find his colors over-saturated and feel that he could do more with his compositions. And the guy himself is uh, somewhat over the top. He presents himself as an extreme wilderness adventurer with an unparalleled dedication to his craft, which may be true if you come at it from a standpoint of an armchair photographer, or it may not if you come at it from the standpoint of someone like Marc Adamus, who just spent weeks by himself backpacking and photographing in the Yukon Territory. But as much as Peter Lik’s extreme persona rubs me the wrong way, I admit to having a huge amount of respect for his business acumen and marketing savvy, because he understands one thing very clearly: how you present yourself to the world is how the world will see you. I’m not saying you have to be a caricature of awesomeness to be successful in life. I am saying there are some fantastic lessons to be learned here, one of the most important of which is how you value yourself. Do you approach your work with an attitude of self worth or self doubt? Let me give you an example. When I was first starting to do art festivals I had the most rinky-dink, cheap booth setup I could make: a back wall for displaying framed prints and a handful of wooden boxes for displaying matted prints. First go at an art show booth - please pity me! What this setup said was, “ooh, I’m just starting out, please pity me!” It smacked of self doubt. But I learned my lesson, and now my booth says, “I respect myself, I respect my work, and so should you.” Professional art show booth - respect me! Another great example for all the artists out there is pricing. The tendency is to say “I’m just starting out,” or “I’m just a beginner,” or “I’m not trying to get rich from this,” and to set your prices super low. And true, if I can make a 12×18 print for $6 and sell it for $7, well then I’ve made a profit. But what does that say about how I value my work? And how other people should value my work? A second great lesson to take away from this is not just how your present yourself, but what you present in the first place. I once heard that the difference between a professional and amateur photographer is that the professional takes way more bad photos. But the question is, what photos does the professional show? Consider two guys of equal talent. One shares all the photos he takes, good and bad. You know what happens? He builds a reputation for himself as a mediocre photographer who occasionally produces good work. The second guy is brutal in his self-editing and only shares his absolute best stuff. Even though he’s not a better shooter than the first guy, he builds a reputation as an excellent photographer. Here are two sets of images I took. What does each set say about me as a photographer? The first says that I shoot a random mish-mosh of stuff, not that impressive. But the second set says “here’s a guy who takes seascape photography very seriously.” What does this jumbled portfolio say about you? Seascape photography portfolio So what’s the moral of the story here? You don’t have to be disingenuous and pound your chest, saying “I’m the greatest thing since sliced bread!” But if you value yourself, your work, what you do, and you show people that then people will value you too. And that goes for life as well as art. Please leave your own thoughts in the comments below.

Got another question? Check out our Landscape Photography FAQ here: https://www.joshuacripps.com/landscape-photography-faq/

Be sure to subscribe to our newsletter and YouTube channel for even more landscape photography how-to.

Join Josh on Social!

http://instagram.com/joshuacrippsphotography https://www.facebook.com/JoshuaCrippsPhotography

The Top 5 Most Common Mistakes in Landscape Photography

Contrary to popular opinion, mistakes aren’t necessarily a bad thing. They help you learn, they keep Hallmark in business, and sometimes they go hand in hand with really excellent tattoos. And in landscape photography identifying some common mistakes can help you improve your photos by leaps and bounds. Mistakes are a controversial topic in the very subjective world of art. After all, one man’s mistake is another man’s mistook. Nevertheless, I’m going to plunge right in and tell you what I think are the top 5 most common mistakes made by landscape photographers.

Image 5 - sky

Our eyes automatically home in on whatever is most interesting about a scene, so it’s only natural to take our cameras and point them straight at whatever we’re looking at, like say, this fantastic vista. The only problem is, this tends to put our subject smack dab in the middle of the frame and fills half the photo with boring, blue, emptiness. BlueSky001vidTo fix this, pan down, zoom in, or get closer in order to fill your photo with more goodness, and less emptiness.


BlueSky002vid

Image 4 - Poorly Exposed Photos

Your LCD will lie to you. Depending on the lighting conditions you’re shooting in, as well as the brightness of your camera’s display, looking at the LCD alone makes it difficult -if not impossible- to tell if your photo is actually well-exposed. So instead of relying on the LCD, learn to read the histogram in order to get better exposures.

Image 3 - Laxy Fieldwork

Part of the reason that the previous mistake happens so frequently is the idea that any mistakes made in the field can be fixed in post. This far-too-prevalent concept also leads to all kinds of lazy photography, from not using a tripod to making careless compositions. But this approach limits your photography in a serious way. Instead, if you take pains to capture the best possible photo in the field, then rather than making a bad photo good in post, you’ll be making a good photo great.

Image 2 - Bad light blues

Ok ok, before I give mother nature low self esteem, I should say there’s really no such thing as bad light. There is however, light that doesn’t do anything to beautify the particular scene you’re photographing. And the common mistake I see is photographers trying to shoehorn this non-ideal light into a photo where it doesn’t belong.Bad Light

So for any scene you’re shooting, think about what kind of light will make it look the best. For landscape photography an easy place to start is shooting at sunrise or sunset, when the light is generally softer, more colorful, and more even.Good Light

Image 1 - Complexification

And the number 1 mistake I see in landscape photography is this: not showing the viewer what your photo is about. Whether that’s because there’s too much stuff in your photo, there are distracting elements on the edges, or you’re simply not close enough to your subject, the problem is one of obfuscation, or of obscuring the message. And the way to fix it is simple: simplify.

Personally, I approach the issue like I’m making a caricature of the landscape: I figure out what the photo is really about, then I simplify and exaggerate those elements as much as possible, removing distractions and making it clear exactly what I want the viewer to see. Check out this article for more.

And there you have it, my top 5 mistakes in landscape photography. If you have your own common mistakes, feel free to leave them in the comments below.

Got another question? Check out our Landscape Photography FAQ here:
https://www.joshuacripps.com/landscape-photography-faq/

Be sure to subscribe to our newsletter and YouTube channel for even more landscape photography how-to.

Join Josh on Social!
http://instagram.com/joshuacrippsphotography
https://www.facebook.com/JoshuaCrippsPhotography

Want Better Photos? Invest in Experiences, NOT Equipment

Greetings, my fellow photo nerds! Unless you’ve been living under a rock you’ve surely noticed that camera manufacturers constantly come out with newer, better, lighter, faster, snazzier cameras. And while there’s no denying that the image quality of today’s cameras is astonishing, when you want to create striking and memorable photos, is a new camera really where you should be spending your money?

Because when it comes down to it, a great photo is the result of you being in the right place at the right time in order to press the shutter button. And it’s that moment that matters, whether you’re shooting with a modern technological marvel, or a an ancient point and shoot.

In other words, if you want to capture amazing photos, you should invest in experiences, not new equipment.

Let me give you an example: I took this photo in 2007 with a camera that was released in 2005 and it’s still one of my favorite photos and best selling prints. What makes the image is not the camera I used but rather the light, the scene, and the magic of the moment. It was the fact that I invested my time, money, and energy into the experience of backpacking to this lake. Marsh Lake

Similarly, I took each of these photos with various cameras that aren’t even manufactured anymore because they’re considered obsolete by today’s standards. And yet, they’re all photos I’m very proud to have in my portfolio, and which helped me build my career as a nature photographer. In each case it was the moment, and the application of my creative vision that made the photo, not so much the camera I used. These photos are the result of seeking out beautiful experiences, not beautiful pieces of equipment.

Now, don’t get me wrong. I do believe that good gear is good and better gear can be better. But think hard about where you really want to invest yourself. If you only have a certain amount of money to spend, are you going to create memorable photos by buying a new camera, or by spending that same money on the opportunity to photograph something that makes your heart sing? If you’re fortunate enough to be able to invest in the equipment AND the experiences, then more power to you. But if you have to choose between the two, then the choice is clear. Because I guarantee you that when you look back at your photos years down the road, you’re going to remember those magical moments, not the box you used to capture them.

Got another question? Check out our Landscape Photography FAQ here:
https://www.joshuacripps.com/landscape-photography-faq/

Be sure to subscribe to our newsletter and YouTube channel for even more landscape photography how-to.

Join Josh on Social!
http://instagram.com/joshuacrippsphotography
https://www.facebook.com/JoshuaCrippsPhotography