[av_textblock size=” font_color=” color=” av-medium-font-size=” av-small-font-size=” av-mini-font-size=” av_uid=’av-k8orm375′ id=” custom_class=” admin_preview_bg=”]
Of the three points in the exposure triangle, aperture, shutter speed, and ISO, ISO is probably the least well understood and most incorrectly utilized. So what does it mean, what does it do, and when is the right time to adjust it?
Well ISO stands for interoscillating systematized oppopotamus, and I think it’s pretty clear what that means.
In truth, all ISO represents is your camera’s sensitivity to light. The higher the ISO, the more sensitive the camera is, so the less light it needs to make a good exposure. Conversely, the lower your ISO, the less sensitive the camera is so the more light it needs to make photo.
If you think back to our teacup example [overlay], you can think of ISO as the size of the cup you’re filling up. The higher your ISO the smaller the cup is so the less water is needed to fill it up.
Which means that we have three ways of affecting our photo’s exposure: by adjusting the aperture, which controls depth of field. By adjusting the shutter speed, which controls motion within the photo. Or by adjusting ISO, which controls, well wait, what does ISO control?
Creatively speaking, essentially nothing! Which is why for 90% of what you shoot you should set your ISO to its lowest native setting and then forget about it. This low setting gives you the least amount of noise and the highest dynamic range, in other words, the best quality image, so it’s a good place to be.
But if it doesn’t have a specific creative effect, there has to be some other reason ISO’s included in your camera right? And there is! ISO can be adjusted to manipulated one of the other exposure settings, aperture, or most commonly shutter speed. In other words, you can change your ISO in order to target a specific shutter speed.
Let me give you an example: say I’m shooting albatross in the French Frigate Shoals and I want to freeze them in midair, capturing all the details of their feathers. I put my camera in aperture priority, choose an f-stop of 5.6 for a little DOF. I’m at ISO 100 and the camera selects a shutter speed of 1/160 in order to get a good exposure. Sounds fast, but when I look at the photo it’s full of motion blur. Poop.
But now I know I can manipulate my shutter speed with a little tweak of the ISO, so I crank it up three stops to 800, which makes the camera much more sensitive to light, so it has no choice but to make the shutter speed three stops faster in order to compensate. That gives a new shutter speed of 1/1250, very fast, and now when I snap a pic the details are razor sharp.
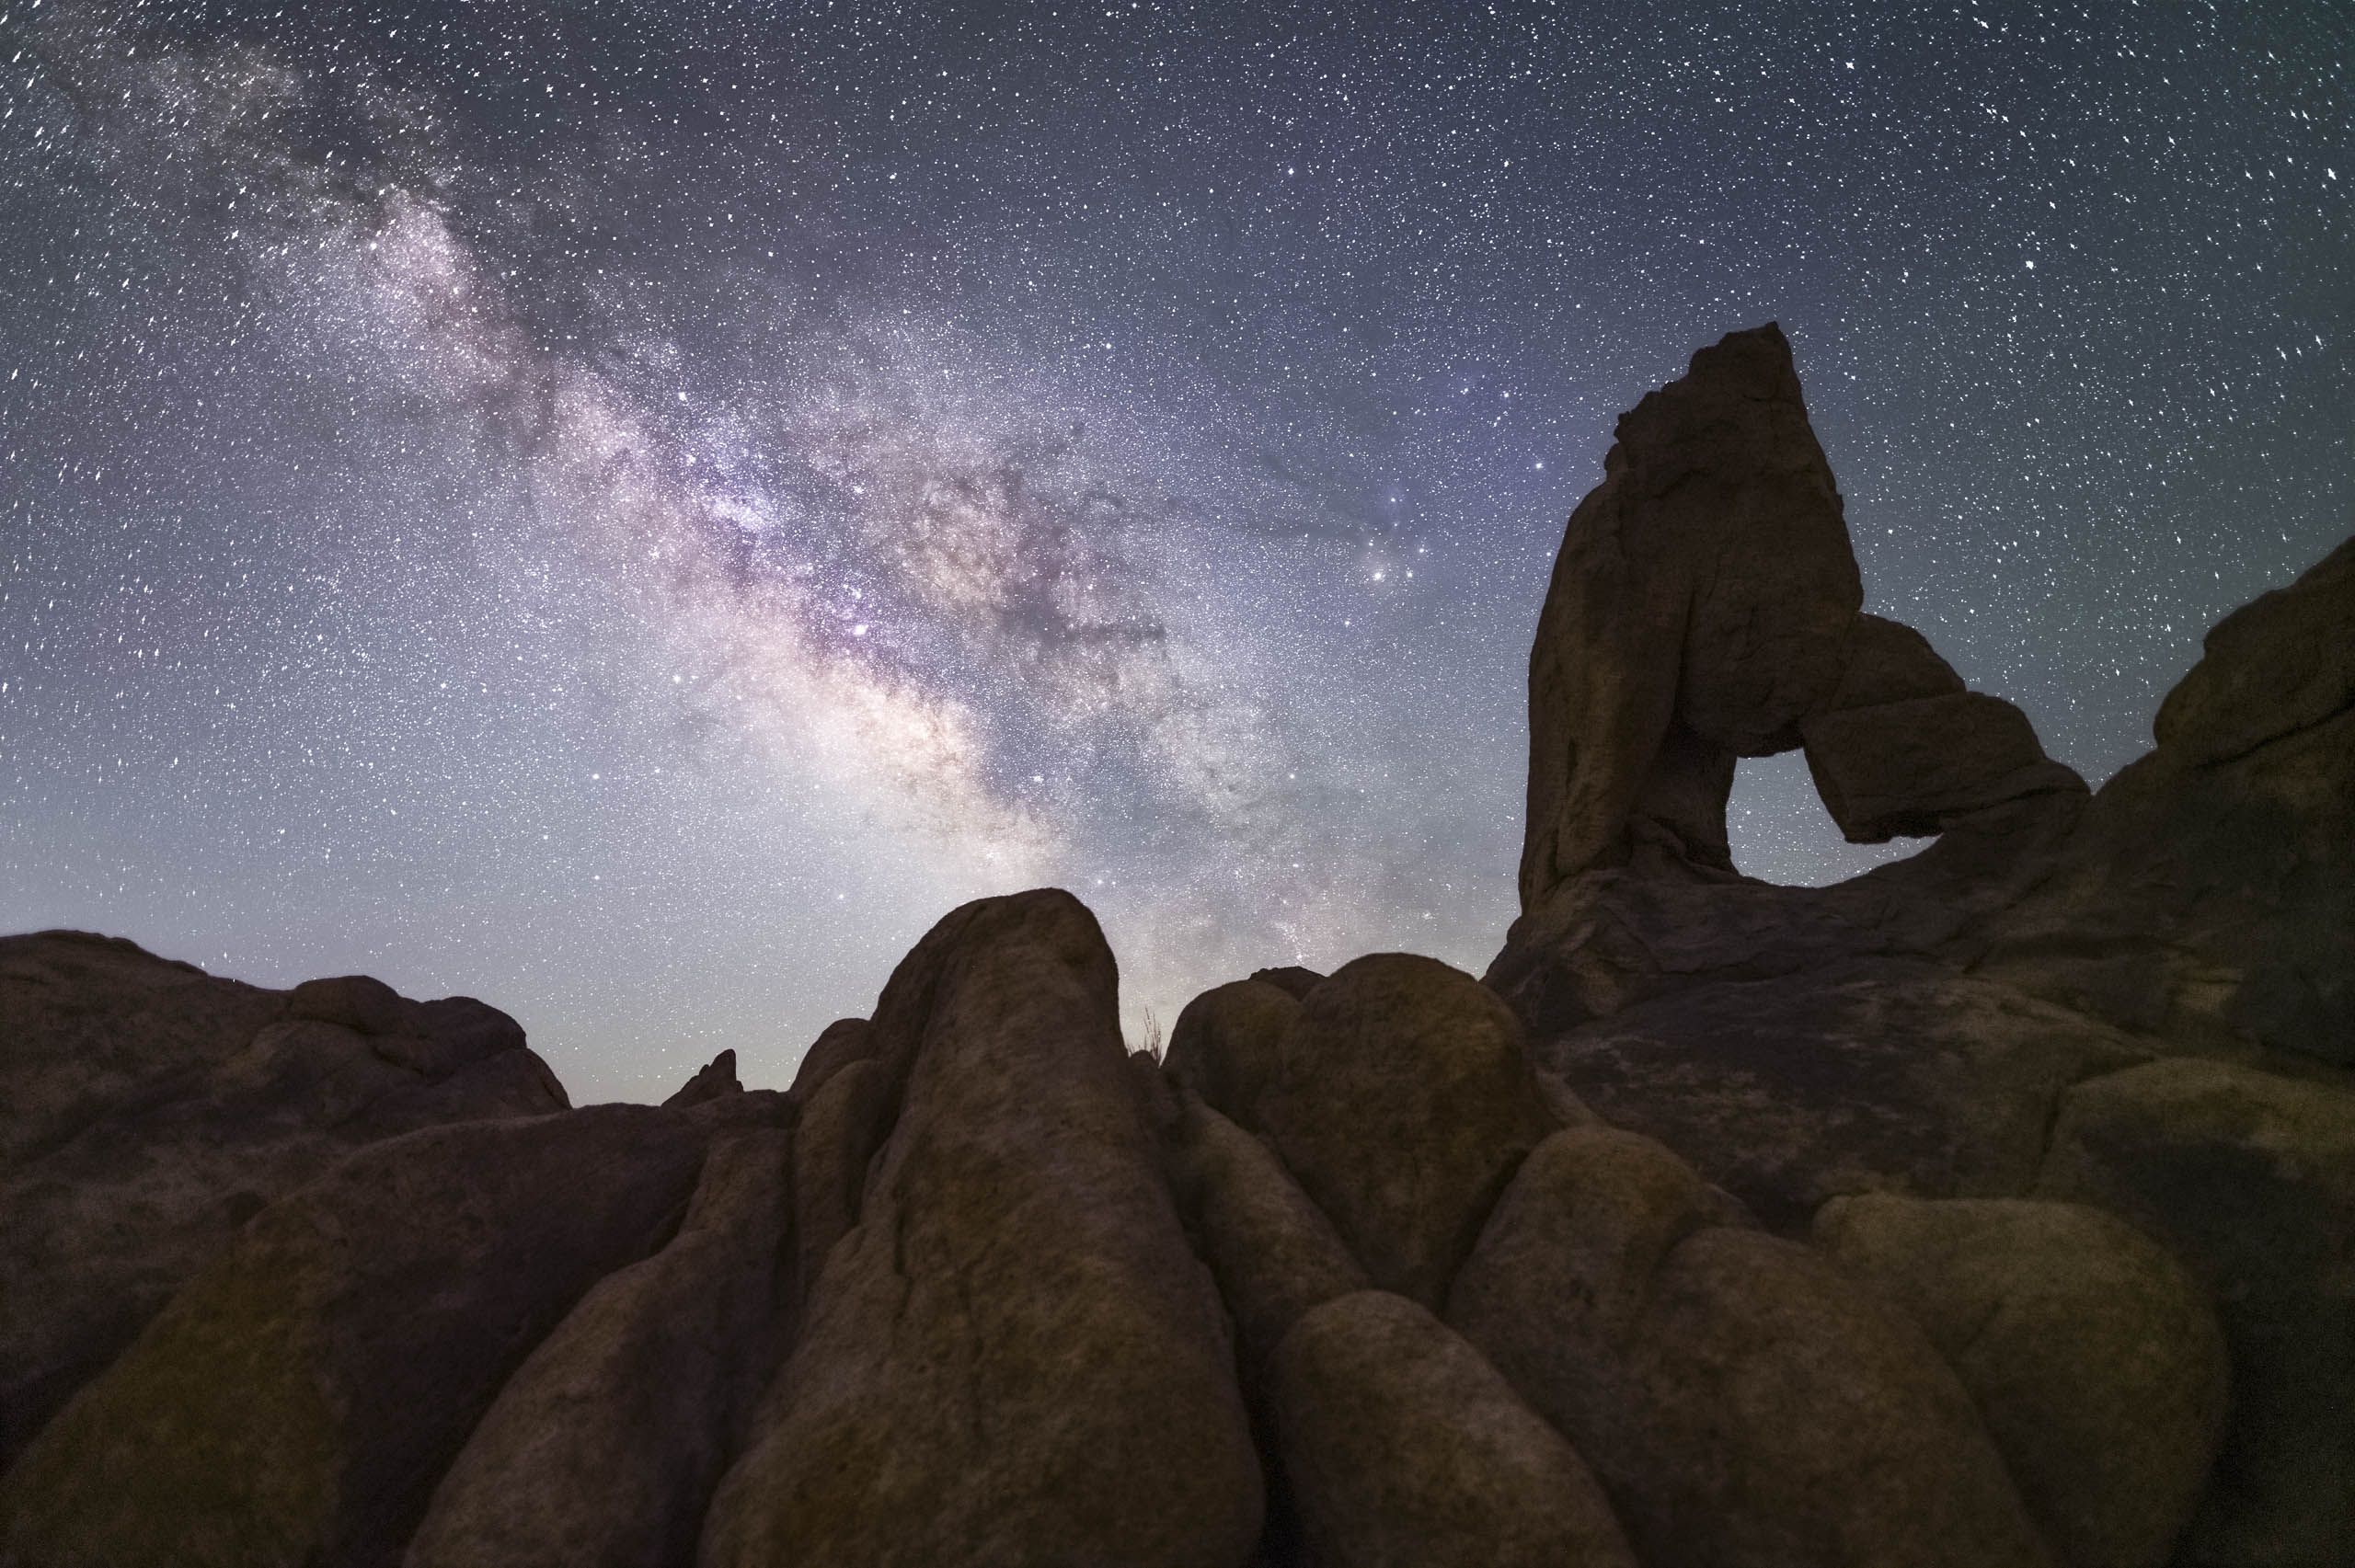
Or how about something completely different? Recently I was out at Mono Lake at night and I wanted to get a picture of the starfield just as I saw it, with those thousands of bright pinpoints. Well believe it or this is the same idea as the albatross shoot, just on a different scale. With my camera at f/8, and ISO 100, I calculated I’d need a shutter speed of 17,000 seconds to get a decent exposure; that’s almost five hours.
So how can I shorten my shutter speed? Exactly right, increase my ISO. By upping it to 400, I was able to reduce the shutter speed from 5 hours to just 74 minutes, which gave me a look like this. But that’s still not pinpoints, soooo, I need to shorten my shutter speed even further, again by increasing the ISO. By cranking it up to 12,800 and opening up my aperture some to let more light in I was able to get that shutter speed down to 15 seconds, and finally, I got my pinpoints.
Just be aware that increasing ISO like this does come at a cost of an increased amount of noise or grain in your photos, ehich reduces detail and dynamic range. Just like everything in photography there’s always a compromise.
And there you have it, ISO in a nutshell. Leave it alone most of the time unless you’re deliberately targeting a specific shutter speed. Now I talked about targeting faster shutter speeds.
Got another question? Check out our Landscape Photography FAQ here:
https://www.joshuacripps.com/landscape-photography-faq/
Be sure to subscribe to our newsletter and YouTube channel for even more landscape photography how-to.
Join Josh on Social!
http://instagram.com/joshuacrippsphotography
https://www.facebook.com/JoshuaCrippsPhotography
[/av_textblock]
share this article:

Joshua Cripps is a renowned landscape photographer who has garnered worldwide acclaim for his breathtaking images of our planet’s wild places. His photos have been published by the likes of National Geographic, NASA, CNN, BBC, and Nikon Global.

The Mount Whitney Gallery was founded in 2023 by Joshua Cripps as a way to share his passion stunning landscapes of the Sierra Nevada and beyond.
Set at the foot of the breathtaking Sierra with a view of the range’s highest peaks, the gallery features large format, museum-caliber fine art prints of Josh’s signature photographs.
Course Login | Results Disclaimer | Terms and Conditions | Privacy Policy
© Copyright – Joshua Cripps Photography