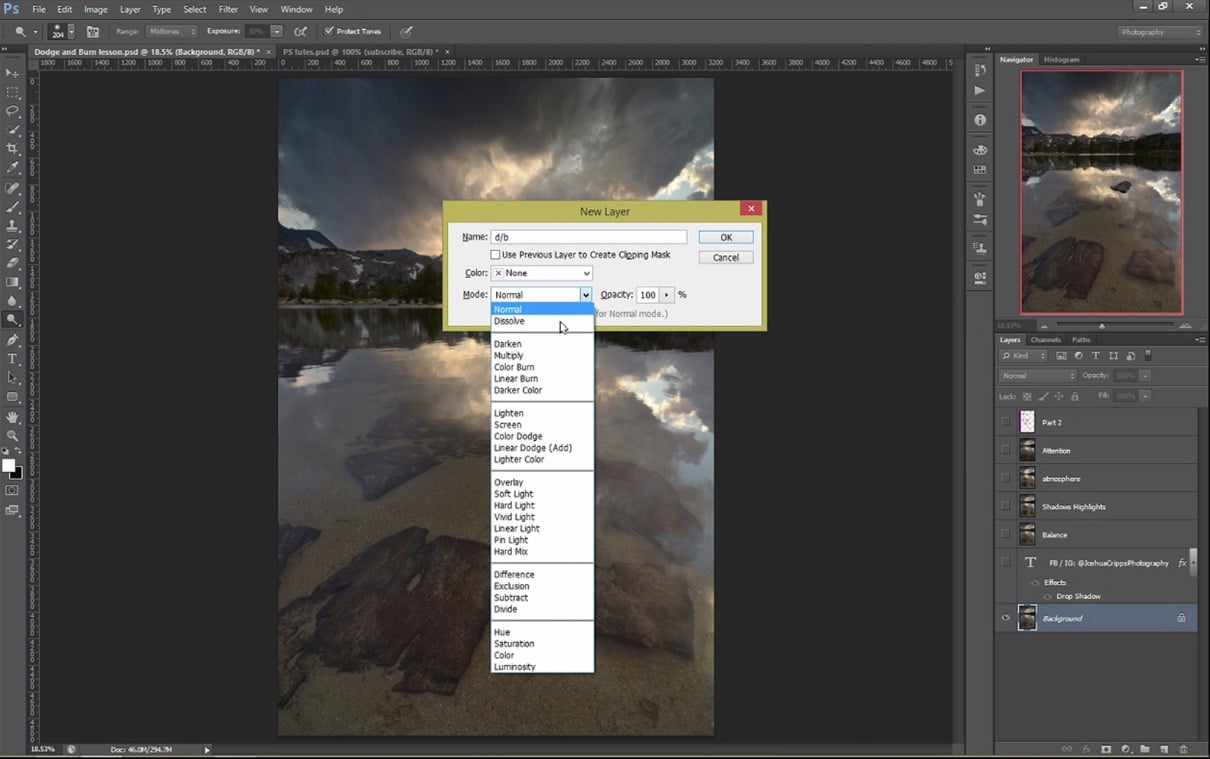
Photoshop: Dodge & Burn…Like A Boss!! Part 2

In part 1 of this video we talked about dodging and burning on a 50% gray layer. It’s an amazing way to d/b non destructively but it’s got two problems: 1) it can wash out your colors, and 2) it’s not very targeted. So now we’re going to learn a couple of easy techniques to deal with these issues.

When you dodge with a plain white brush the image gets lighter and lighter but it also gets whiter and whiter, hence the washed out look. So to fix that issue we’re not going to use white, but rather we’re going to dodge with a color. The best method is to simply grab a dominant color from the area you want to dodge, then go over to the color picker and select a bright version of that color. The closer to white it is the more it will dodge, the closer to the true color the more color it will impart. Somewhere in the middle is usually best.

Now we can dodge without making things washed out, giving the image some nice atmosphere, but our dodging is still not very targeted. For example, say I want to dodge this cloud without brightening the surrounding shadows. Or what if I want to lift the shadows in the mountains without affecting the bright areas? There are many complicated ways to do this but I’m going to show you a super simple one, booyah!

First, take your image and add a burn and dodge layer. Now add a layer mask. And before you do anything else go to Image -> Apply Image. Select the defaults and click OK. Photoshop has taken a black and white copy of the photo and made it into a layer mask.

As I’m sure you all know, when it comes to layer masks white reveals and black conceals. In other words, wherever our mask is bright our adjustment will show up, and wherever our mask it dark it won’t. Which means we now have an amazing way to dodge and burn exactly what we want. Want to dodge those highlights with a little color? pop pop pop, the shadows are unaffected.

Or say you want these shadowy trees to be just a little brighter? No problem, make another burn and dodge layer. And go Image -> Apply Image. This time, select Invert and click OK. Select the layer mask then hit Ctrl/Cmd M to bring up a curves adjustment. Use the little hand, the targeted adjustment tool, and whatever you want to be affected by your dodging, the trees for example, click and drag up. Whatever you don’t want to be affect, the mountains for example, click and drag down. Now our dodging is just where we want it.

And that’s all there is to it! some tried and true, easy techniques to burn and dodge like a Photoshop ninja. Try not to cut anyone’s arm off with your katana skillzzz.

If you’d like to see the rest of my editing process and exactly how I took this straight out of camera photo and processed it to look like this in its final form, you can check out the complete PS walkthrough by clicking here.

As always, thanks for reading. If you enjoyed this article please share it with your friends, give it a thumbs up, and subscribe to Professional Photography Tips, the absolute best place on the web to learn to become a better photographer. Don’t forget to join the FB group and newsletter to get photo critique and processing help. Until next time have fun and happy shooting.

Got another question? Check out our Landscape Photography FAQ here:
https://www.joshuacripps.com/landscape-photography-faq/

Be sure to subscribe to our newsletter and YouTube channel for even more landscape photography how-to.

Join Josh on Social!
http://instagram.com/joshuacrippsphotography
https://www.facebook.com/JoshuaCrippsPhotography

Photoshop: Dodge & Burn…Like A Boss!! Part 1

For those who don’t know what burning and dodging is, I’ll summarize here really quickly: burning is a way to selectively darken parts of your photo, and dodging is a way to selectively brighten parts of your photo.

Now why would you want to do this? There are a couple main reasons. One is to correct exposure issues in the frame, like if you need to balance the brightness of one area with another, or if you want to emphasize certain highlight and shadow areas. You can also use burning and dodging to add atmosphere to an image. But the big daddy reason is this: to completely control and direct your viewers’ attention in your photo. In photos people will pay more attention to the bright parts than the dark parts, and knowing this you can get them to look at whatever you want them to look at.

Ansel Adams was a master at this process and if he wanted you to look at a certain part of the photo well by gum he burned and dodged that sucker until you couldn’t help yourself but look exactly right there. For example, here’s a before image. Fine, but with a little burning and dodging I force your attention away from the edges of the frame and right to that big beautiful mountain in the middle. It’s sort of like mind control, so try not to abuse your soon-to-be powers too much.

Photoshop has dodge and burn tools built in and they do work, but I don’t like using them because of one key issue: they are destructive. You use these tools directly on the image itself, which means you’re actually changing the pixel values of the photo itself, which is kinda like making a copy of a copy: the more you do it, the worse the image quality gets. So if I dodge dodge dodge, then burn burn burn, things get totally effed.

Instead we’re going to employ the magic of blending modes to burn and dodge in a completely non destructive way. Hit Crtl/Cmd Shift N to bring up the new layer dialog. In the blend mode select soft light and check the 50% gray box. Now switch from the burn/dodge tools to the normal brush tool by hitting B. In a soft light layer anything that’s brighter than middle gray will brighten the underlying layer, and anything that’s darker than middle gray will darken it.

In other words, if I paint with white on this soft light layer, it’s going to brighten the photo. (definitely use a low opacity) And if I paint with black it’s going to darken the photo. So now you can do really cool things like easily add vignettes, and brighten the center of your photo with some simple brush strokes. And best of all, I can always undo these brush strokes, delete this layer, reduce its opacity and do all the other cool things you can do with a separate layer, making this completely non-destructive.

Now you probably noticed that this kind of burning dodging isn’t very targeted; unlike the built-in burn and dodge tools where you can select what tonal range to affect, this just sort of works on everything indiscriminately. And if I use too much in one spot it makes the photo either too flat or too washed out. So be sure to check out Part 2 of this video where I show you some easy techniques to prevent that washed out look, as well as target the burning and dodging more precisely.

Or if you’d like to really improve your Photoshop I’ve got a number of fantastic, in depth Photoshop tutorials . Everything from working with layers and masks to creating killer selections for super targeted editing. So check those out and kick your editing to the next level. Until next time, have fun and happy shooting.

Got another question? Check out our Landscape Photography FAQ here:
https://www.joshuacripps.com/landscape-photography-faq/

Be sure to subscribe to our newsletter and YouTube channel for even more landscape photography how-to.

Join Josh on Social!
http://instagram.com/joshuacrippsphotography
https://www.facebook.com/JoshuaCrippsPhotography