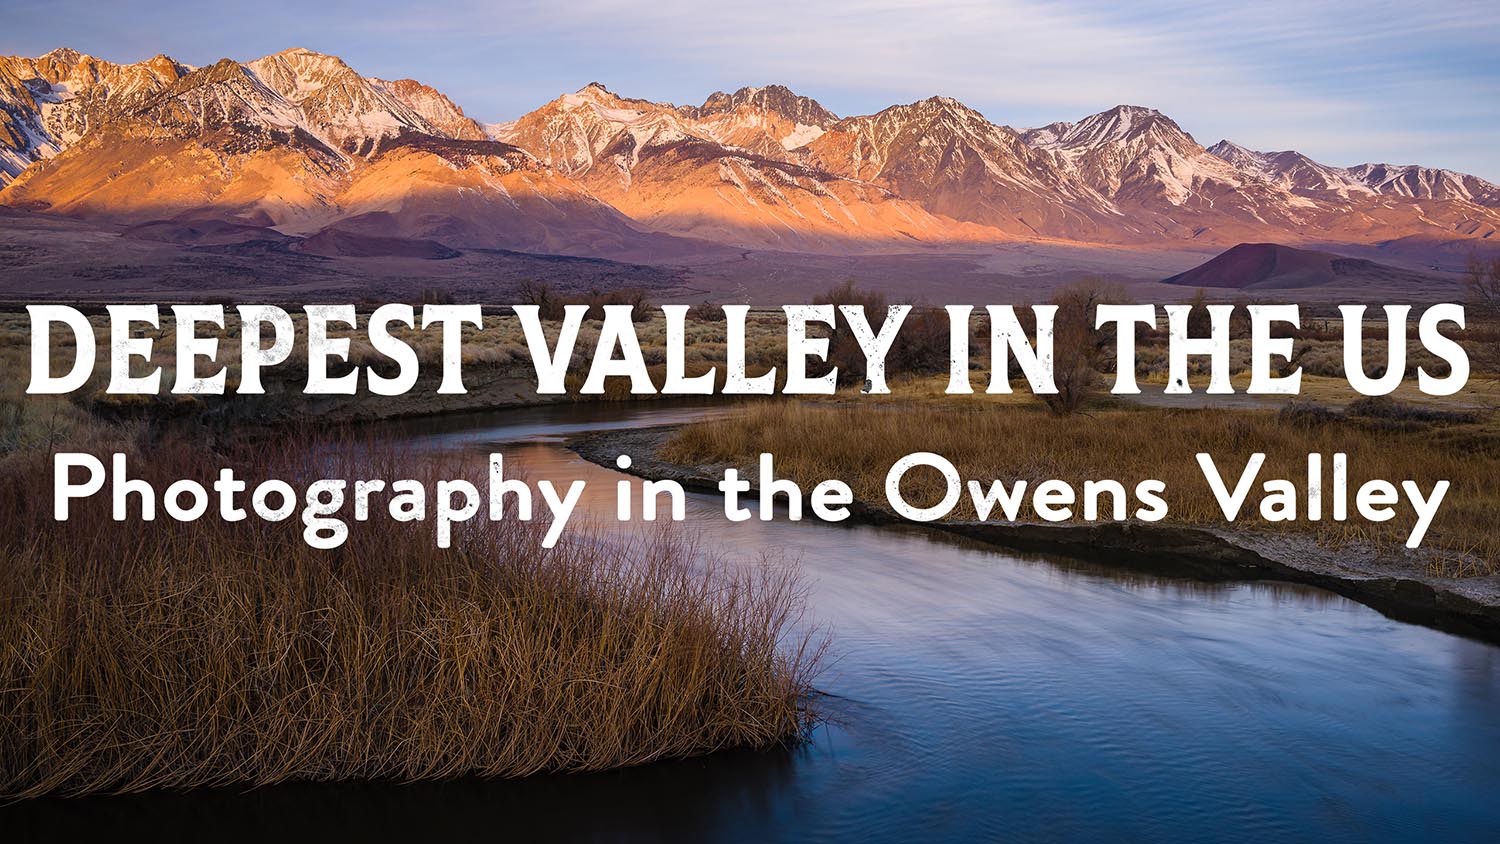

In large part I built my photography career on seascape images and harbor a deep love for them. Yet as beautiful as the ocean is it can be a surprisingly tricky place to shoot. What can you do to take your images to the next level? Here are 6 simple steps you can use to start producing some killer coastal photographs.
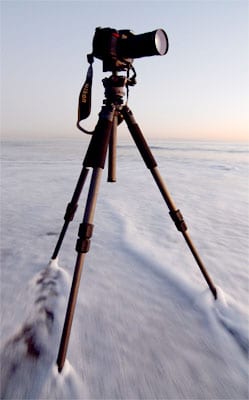 A good seascape starts with some essential gear, and a solid tripod comes in right at the top of the list. If you are getting serious about nature photography then you’re probably familiar with the upsides of using a tripod, the benefits of which go doubly for coastal photography. Not only does a tripod give you a stable base to photograph from to achieve tack-sharp details, it also allows you to use longer shutter speeds. Some of the best seascape images are taken with shutter speeds of 1/2 second to 30 seconds or longer, and if you’re trying to pull off hand held shots at those long exposures, your photos are going to be blurry disappointments. So slap your camera on a tripod and you’ll see an instant improvement in your images.
Top tip for tripods: push your tripod legs deep into the wet sand at the ocean’s edge, and if a wave wraps around the legs, push them deeper still. The wet sand will “cement” around the tripod legs and give you an awesomely stable base to shoot from, even if waves are rushing around you. And always always always make sure your tripod is level. The last thing you want is for your camera to take a dip in the ocean because your tripod was off-balance and fell over.
A tripod gets you 90% of the way to having sharper photos, but to bring out the best in your shots use a remote shutter release as well. The remote release lets you pop off shots without actually touching your camera, so you can eliminate the camera shake that comes from physically pressing the shutter button. Remote releases come in many different styles from wired to wireless, and basic push-button types to fancy intervalometers. In the beginning the kind you buy is less important than the fact that these little gizmos help add extra crispness and detail to your photos.
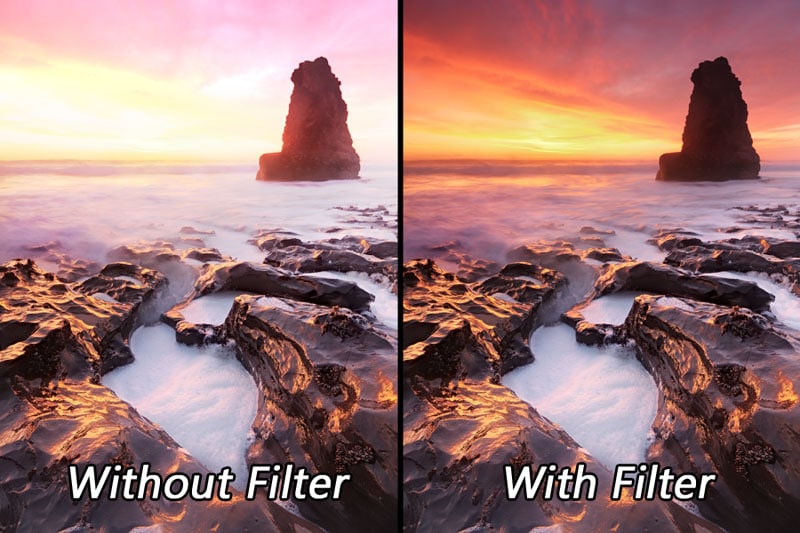 Graduated neutral density (GND) filters are a must-have accessory which will bring your seascape photography up a few notches. Because these filters are dark on top and clear on the bottom they allow you to balance bright light in the sky with darker foregrounds, letting your camera capture the entire dynamic range of a scene. While it’s true that in this digital age many photographers are avoiding GND filters, choosing instead to bracket exposures to combine later in Photoshop, this practice will get you into hot water when photographing the ocean, for one simple reason: the ocean is moving. If you bracket exposures at the coast, the water will look different in each shot, and your exposure blend stands a good chance of coming out funky. Using GND filters ensures you can capture everything you want in a single frame.
But be aware that GND filters are like magnets for salt spray, which is one of those unique annoyances that comes with photographing the coast. Every time a wave crashes it sends tiny droplets of salty water into the air. If it’s windy this salt spray can become a photographer’s nightmare: an ever-present mist that blows into your face and onto your lenses and filters. It’s a terrible feeling to think you’ve nailed a shot, only to find out later your photo is covered with water drops. To combat this problem keep a lens wipe or shammy cloth handy and be vigilant about wiping down your lens and filters.
Lens wipe tip: Paper wipes or absorbent shammy cloths are better than microfiber wipes, which can smear salt spray, leaving behind a residue on your lenses and filters. Always bring more than a few wipes with you because sooner or later you’re going to drop one into the ocean and you’ll need a backup.
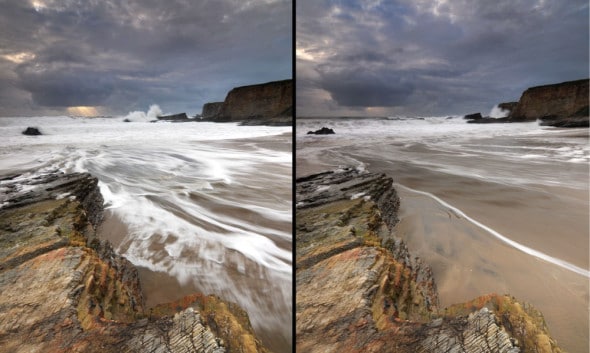
 The number one thing you can do to improve the content of your seascape images is simple: get closer to the ocean. Don’t be afraid to get into the surf zone and get a little wet. By getting up close and personal with the ocean you will dramatically increase the impact of your photos. You’ll also be in a better position to show off ocean dynamics like wave action, crashes, splashes, whooshes, and cascades. The photos at left show the exact same subject matter and yet one is clearly more interesting than the other. The photo on top was taken 20 feet above the surf zone, whereas the photo on the bottom was taken in the surf zone and is consequently more dynamic, engaging, and full of impact. The simple act of walking 20 feet closer to the ocean improved this photo immeasurably.
Safety tip: Never ever turn your back on the ocean and be aware that rogue waves can occur at any time and can be much larger than other waves, so always keep one eye on the sea. This is especially important when you are shooting in the surf zone. Always have an escape route planned and keep your gear handy in case you need to make a dash for safety. If you do get hit by a wave, don’t try to run as you will most likely trip and fall. Instead, stand your ground and turn sideways to reduce your profile.
One of the great joys of seascape photography is the ability to dramatically alter the look of your images simply by changing your shutter speed. Playing with shutter speed lets us shoot “into the 4th dimension” by capturing visuals that our eyes can’t see.
Whenever there is motion in a scene, shutter speed can be used to capture that movement. Pick a fast shutter speed like 1/100th of a second to freeze crashing waves in mid-air, creating tension and drama in your images. A longer shutter speed of around 1 second can be used to create silky streamers and soft curls in ocean waves. And a very long shutter speed of 30 seconds is useful for creating a completely smooth, misty look to the water.
But what’s really fun about shooting the ocean is not just that it’s moving, but that it’s constantly changing. Unlike shooting a waterfall where back-to-back exposures at the same shutter speed will look identical, back-to-back exposures at the ocean can exhibit entirely different characters and moods, even if the camera settings remain the same. Depending on whether a wave is just beginning to crest, or rushing up the beach, or flowing over some rocks, or washing back out to sea, when you press the shutter button has a remarkable effect on the outcome of your image. So once you’ve found a shutter speed you like, experiment with timing your shots while the ocean is doing different things, and you’ll surely notice some fantastic elements being added to your photos.
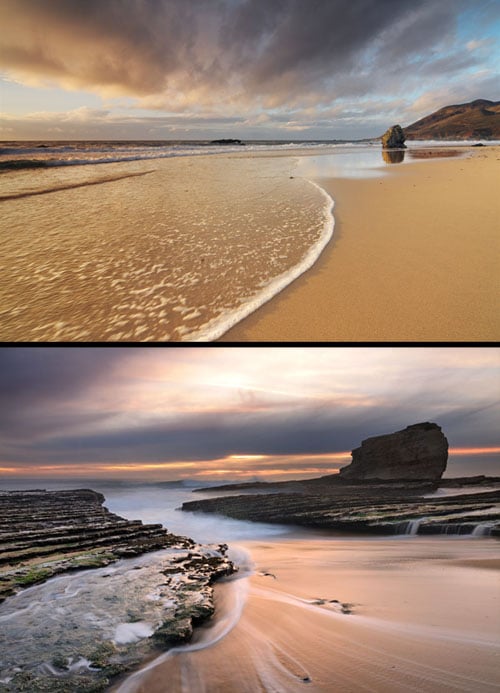
Compositionally, one of the most important elements in a landscape photo is leading lines. Leading lines are natural pathways that move your viewer’s eye through your image, connecting your foreground to your background. The ocean does a wonderful job of creating leading lines for us, if you know where to look. One of the most obvious lines you can use in your seascape compositions is the line of foam a wave creates as it comes up the beach, as you can see in the top left photo.
But perhaps even more interesting lines are created by the motion of the water itself. By stretching your shutter speed out to 1-2 seconds you can capture the movement of a wave as it moves up and down the beach, creating beautiful running streamers of water that pull your viewer’s eye into your image, as seen in the image on the bottom.
Top tip for creating wave streamers: set your shutter speed to 1-2 seconds. Wait for a wave to crash, rush up the beach, and pause at the top. Just as the wave begins to flow back into the ocean, trip the shutter. Your 1-2 second exposure will capture the movement of the out-flowing water and create beautiful streamers.
No matter what you use as leading lines for your image, make sure that they flow into your photo. Lines that cut horizontally across your frame or flow out of the shot create visual roadblocks which lead your viewer’s eyes out of the image.
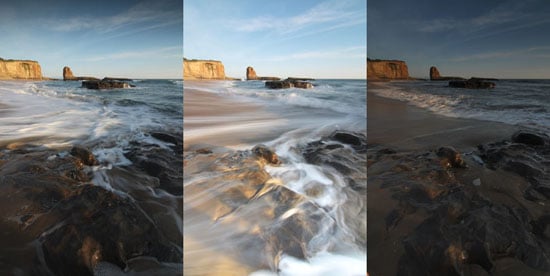
Many landscape photographers like to shoot in aperture priority mode because it’s easy: you pick an aperture to get the depth of field you want, and the camera decides the necessary shutter speed in order to get a proper exposure. However, when shooting seascapes your camera can be easily fooled into creating bad exposures. As waves are crashing and splashing through your scene, your camera will constantly be adjusting exposure to try to keep up with these changing conditions. And unfortunately, most of the time the camera will fail miserably and produce wildly varying results. Despite being taken back to back, the exposures at left shot in aperture priority vary by as much as 3 full stops!
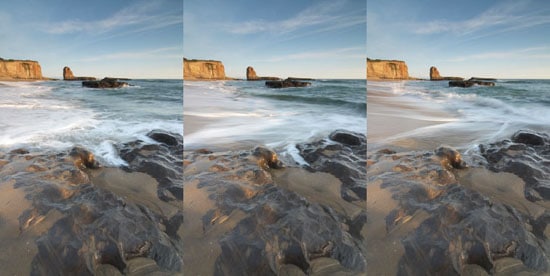
By switching to full manual mode you will lock in an exposure which doesn’t change from shot to shot, meaning you get consistent and repeatable results as seen in the three bottom images.
For a similar reason it’s important to use manual focus when shooting seascapes. When photographing a moving subject like the ocean your camera’s autofocus can search around a bit before it locks focus. If you are photographing a sequence of wave shots nothing hurts more than having a shot or two in the middle be blurry because your camera was hunting for focus. Use manual focus to avoid this issue. A good trick is to use autofocus to nail your focus initially, but then switch to manual focus and be assured that the rest of your shots will be tack sharp.
Got another question? Check out our Landscape Photography FAQ here:
https://www.joshuacripps.com/landscape-photography-faq/
Be sure to subscribe to our newsletter and YouTube channel for even more landscape photography how-to.
Join Josh on Social!
http://instagram.com/joshuacrippsphotography
https://www.facebook.com/JoshuaCrippsPhotography